
Creating and Managing Discounts
How to add a new discount
Go to Configuration → Discounts in the left sidebar.
Click + Add Discount
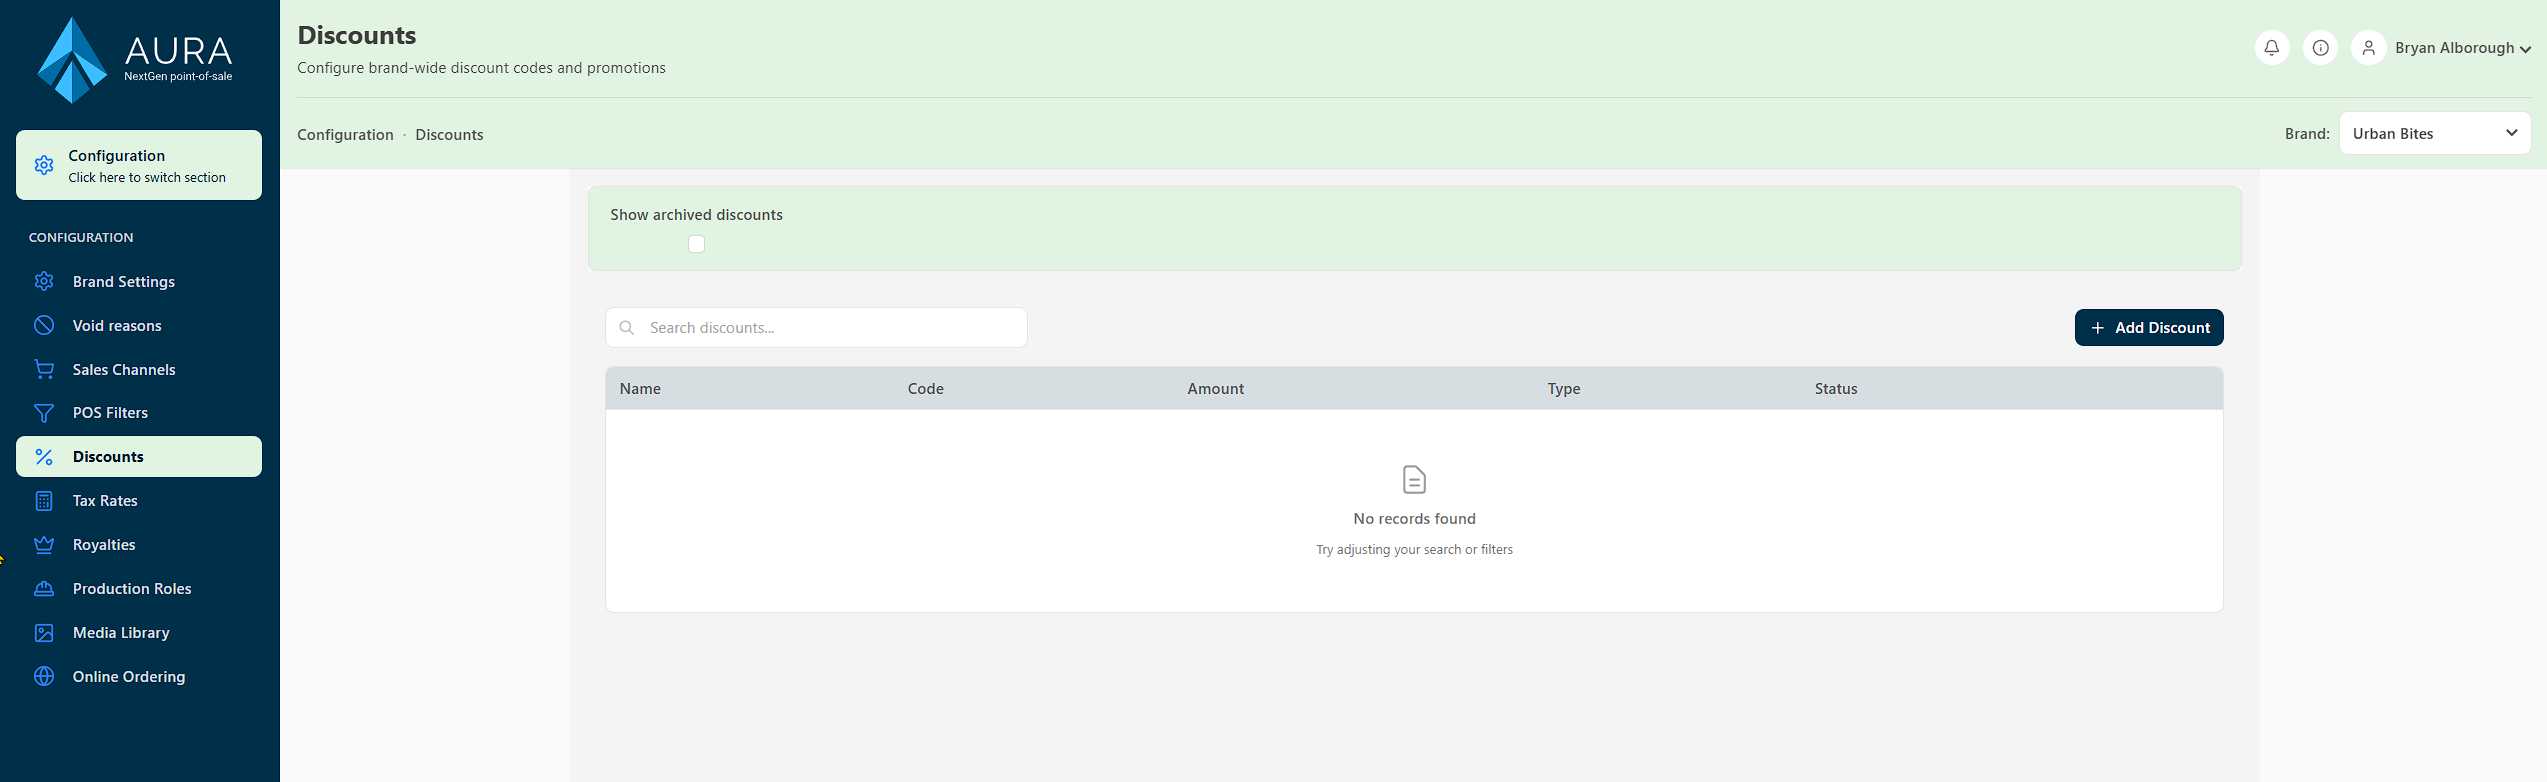
Fill in the discount details in the Add New Discount panel:
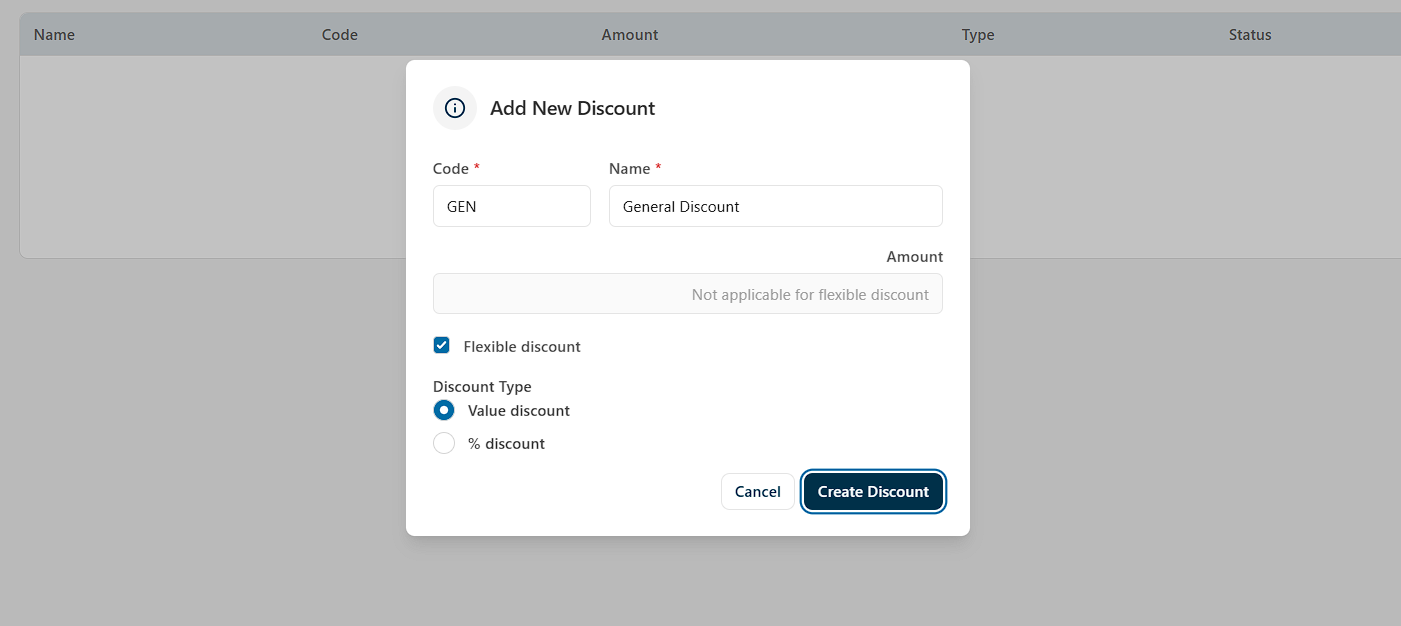
- Code (required) - A short identifier used to distinguish the discount — e.g. GD, STAFF10.
- Name (required) - A descriptive label shown in reports and on receipts — e.g. General Discount.
- Amount (required) - The discount value. For a fixed discount enter the rand amount; for a percentage discount enter the number (e.g. 10 for 10%). Leave as 0 if using a flexible discount.
- Flexible discount - When ticked, the cashier is prompted to enter a custom amount at the time of sale. The Amount field is ignored.
- Discount Type - Choose Value discount to deduct a fixed rand amount, or % discount to deduct a percentage of the total.
Click Create Discount to save.
Fixed amount — deducts a set value. Example: A discount with amount R20, type "Value" discount would deduct R20 from the value of the invoice or item.
Percentage — deducts a percentage of the transaction total. Example: A discount with amount 10, type "% discount" would deduct 10% off the value of the invoice or item.
Flexible — the user enters the amount at the time of sale. Useful for discretion discounts. Example: a discount with "Flexible discount" ticked would allow a user to choose the percentage that they're discounting at the moment in CounterPOS.
Once created, discounts appear in the list showing their name, code, amount, type, and status. Use the edit icon to update a discount or the delete icon to remove it.
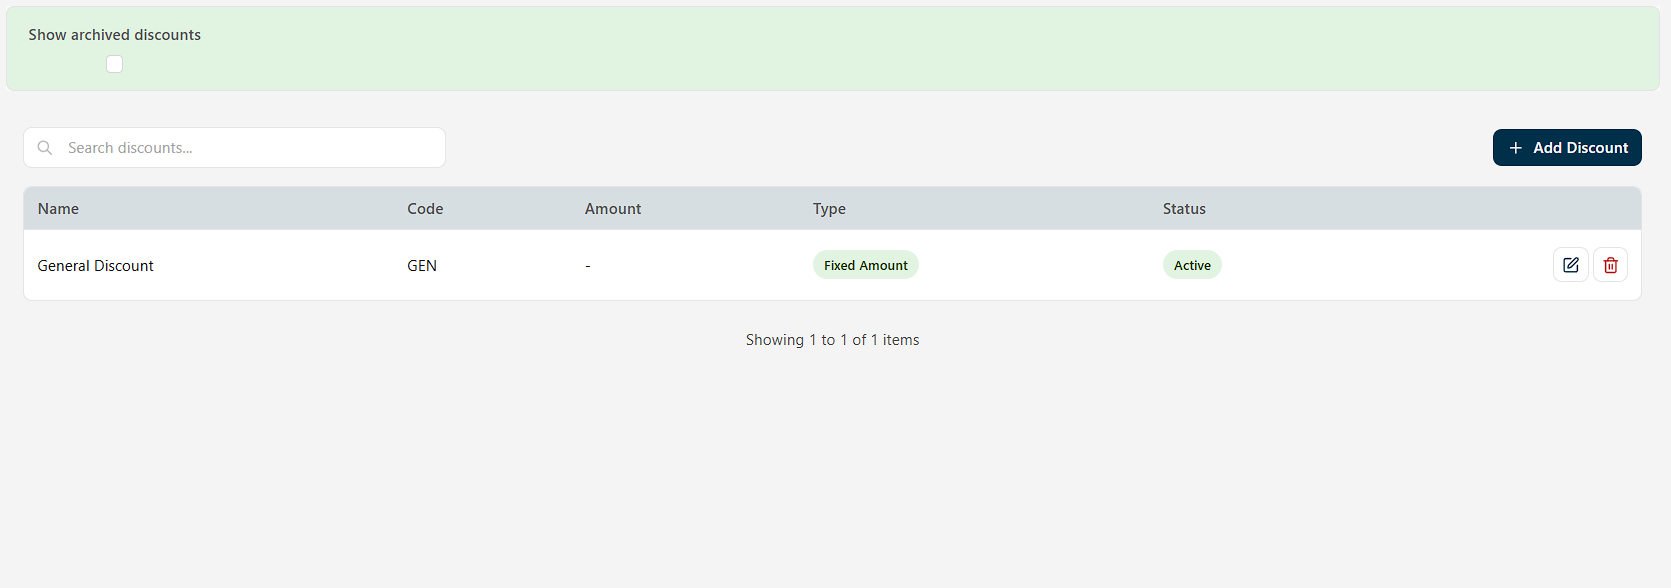
To view previously removed discounts, toggle Show archived discounts at the top of the page.