Creating and Managing Menu Items
Adding a New Menu Item
A new item can be added directly within a category by clicking “New menu item” on the category header.
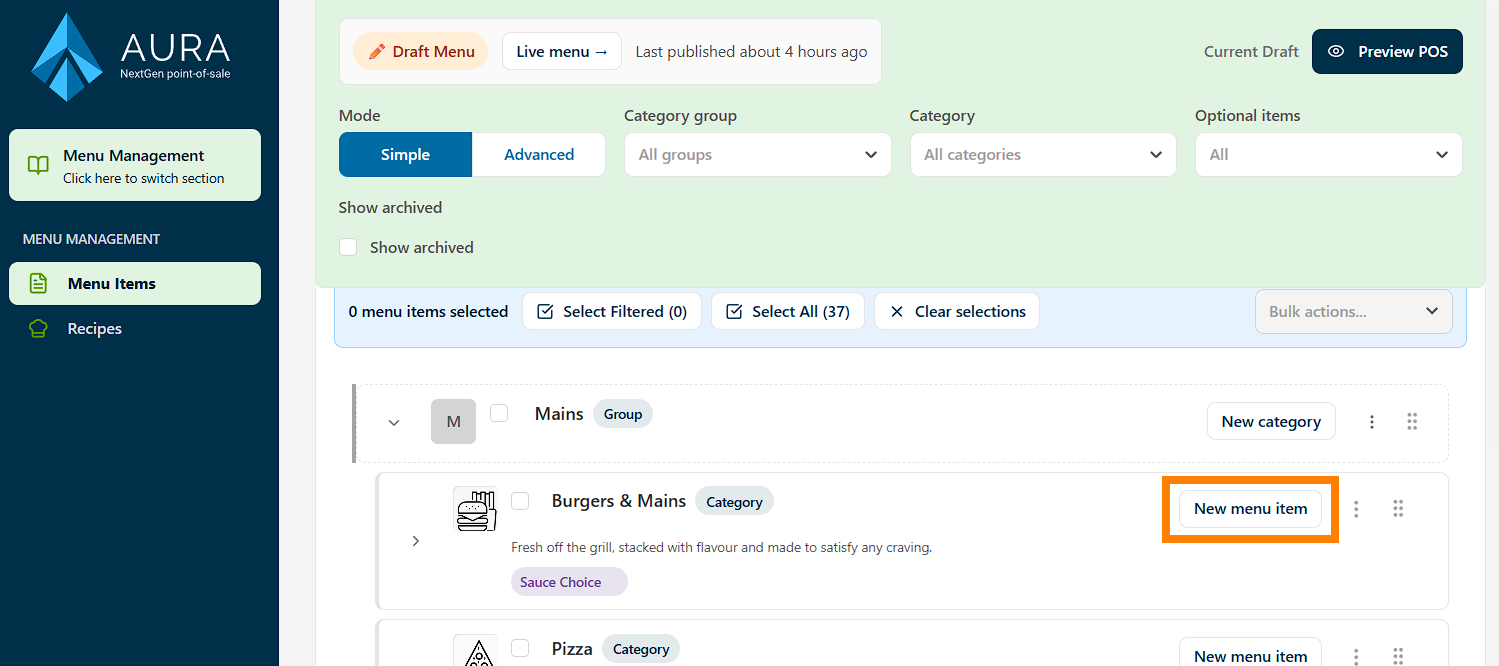
This opens the Create Item popup, where the initial item details are captured.
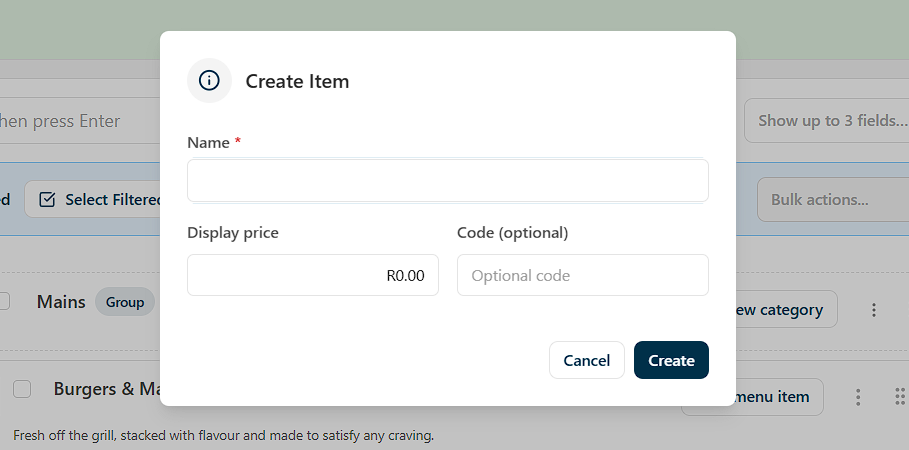
At a minimum, an Item Name and Price must be provided. An optional PLU Code can also be entered for internal tracking or integration purposes. Once created, the system immediately opens the Edit Item panel, where the full configuration is completed.
Item Details
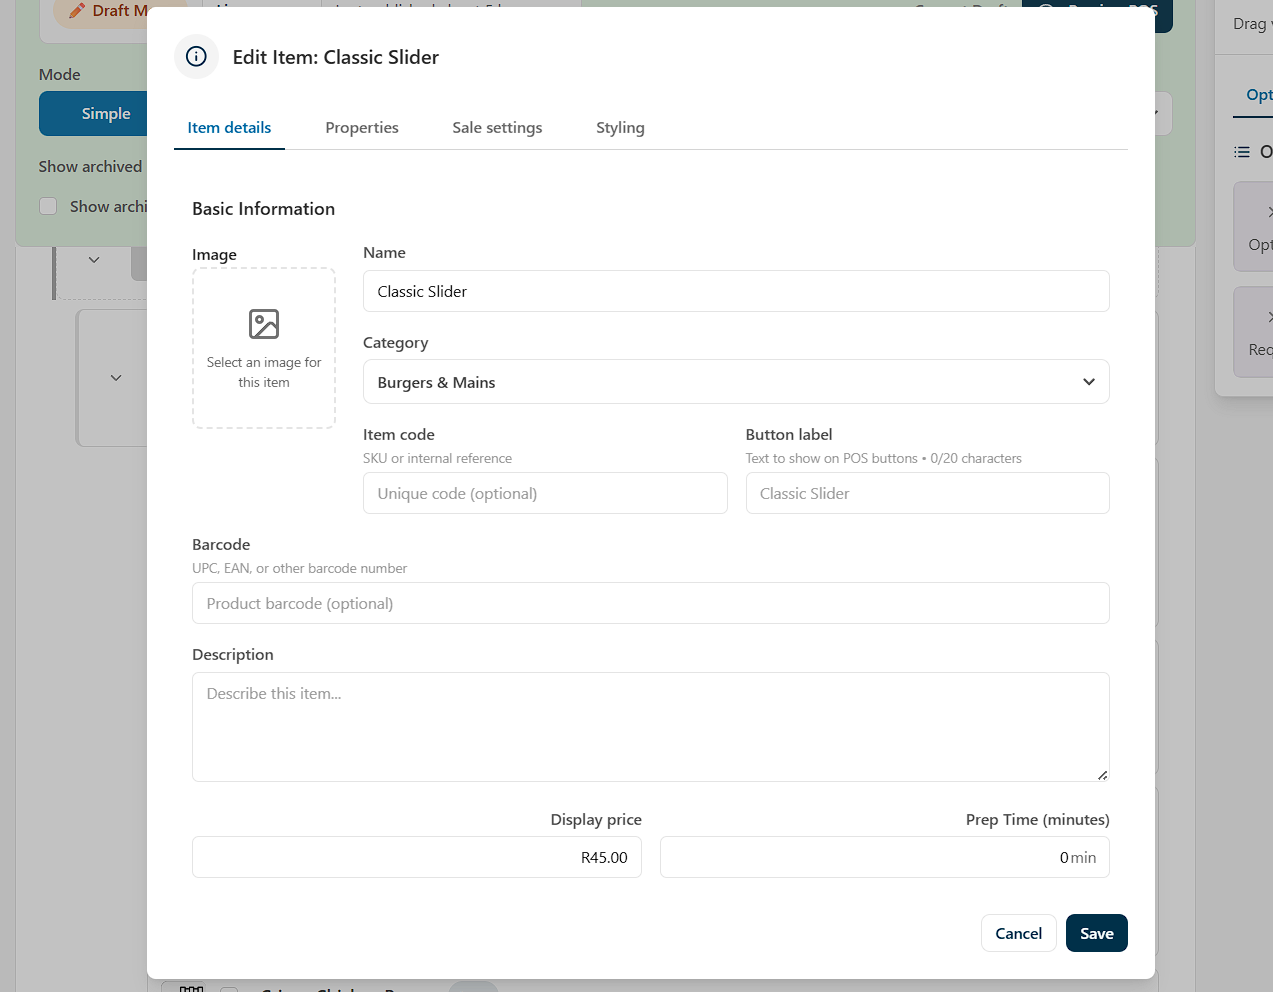
Item Details tab defines how the item is presented to customers.
- An item Image can be uploaded, which will appear on self-service kiosks and other customer-facing platforms, so it should accurately represent the product.
- The name and category will already be filled in from the initial new menu item step, but can be edited here.
- The Item code is the optional PLU code as mentioned above.
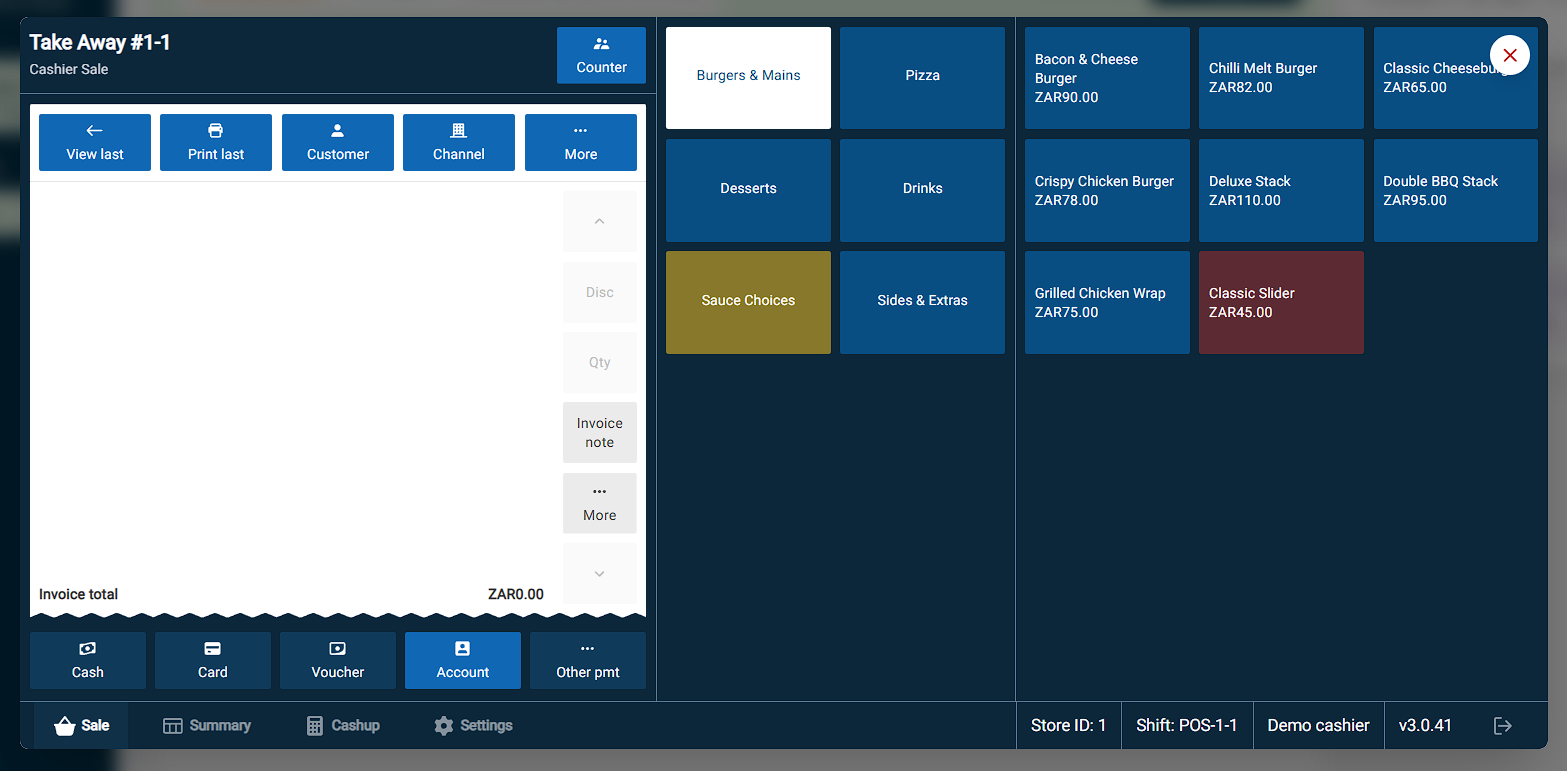
- The Button label lets you put an alternative description to show on the POS button, useful if you want a shortened or in-house name for an item.
- A Barcode number can be captured here so the item can be recognised by barcode scanner.
- A description can also be added. This appears on online ordering platforms and kiosks, and should be clear, concise, and informative. In practice, this field serves as a subtle sales tool, and helps guide customer choices.
- If required, a specific Prep time can be set for the item. This is useful when the item differs from the default category or global prep time, and contributes to both reporting and customer-facing wait time estimates.
Properties
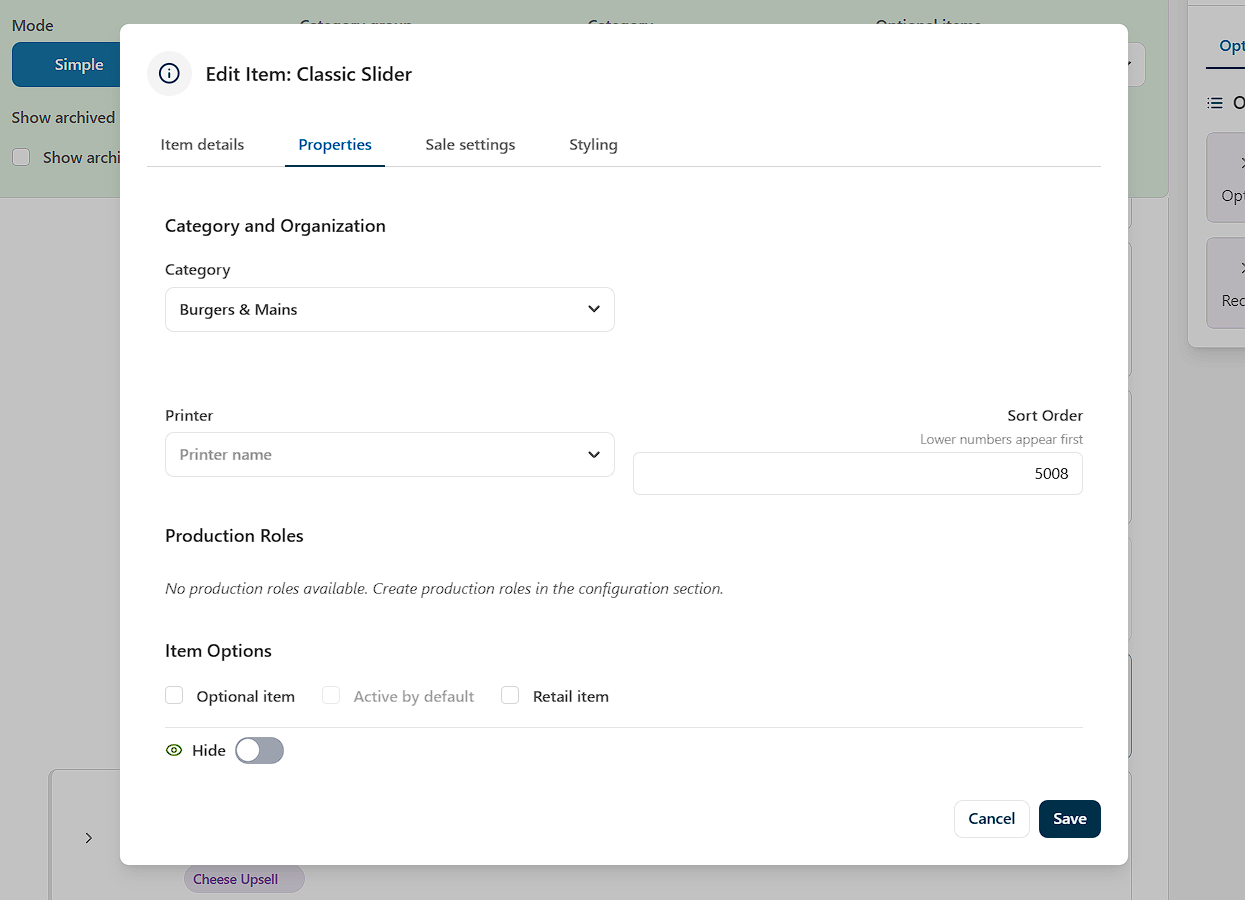
The Properties tab controls how the item behaves operationally within the system.
- The assigned Category can be adjusted if needed, allowing the item to be repositioned within the menu structure.
- Printer routing can be configured to ensure that the item is sent to the correct preparation station in the kitchen. This is particularly important in environments where different stations handle different product types.
- The Sort Order determines where the item appears within its category. Lower values place items higher in the list, which is typically used to prioritise high-volume or high-margin items for faster access.
- Items can be marked as Optional, which means then need to be set as Active before they show on the POS. This is useful when multiple stores are using this menu and some stores may use items that others do not. Additionally the flag Active by default can be set to make the optional item show by default, though it can still be toggled off at store level.
- Items set as Retail Item are hidden as POS buttons but can be rung up via PLU or barcode.
- Items can be set to Hidden, which keeps them in the system but removes the button from the POS interface. These settings are commonly used for background configurations such as option items or upsell components.
Sale Settings
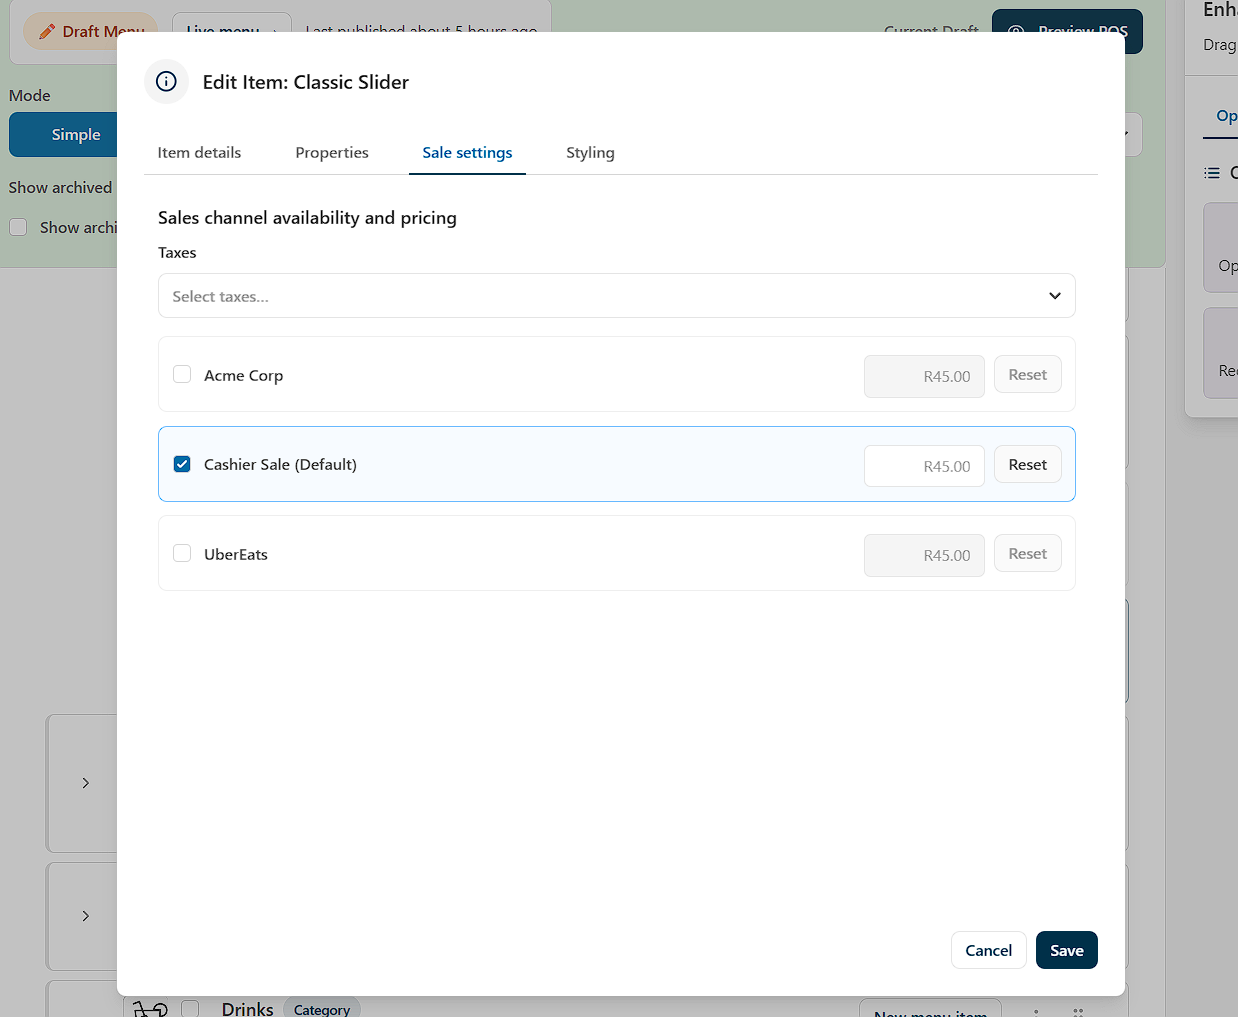
The Sale Settings tab manages how the item is sold across different channels.
- Taxes, such as VAT, can be assigned here to ensure correct pricing and compliance.
- The item’s availability can also be controlled per sales channel, including in-store POS, online ordering, and third-party delivery platforms like Uber Eats. Each channel can have its own availability status and display price, allowing for flexible pricing strategies that reflect commission structures or promotional differences.
Styling
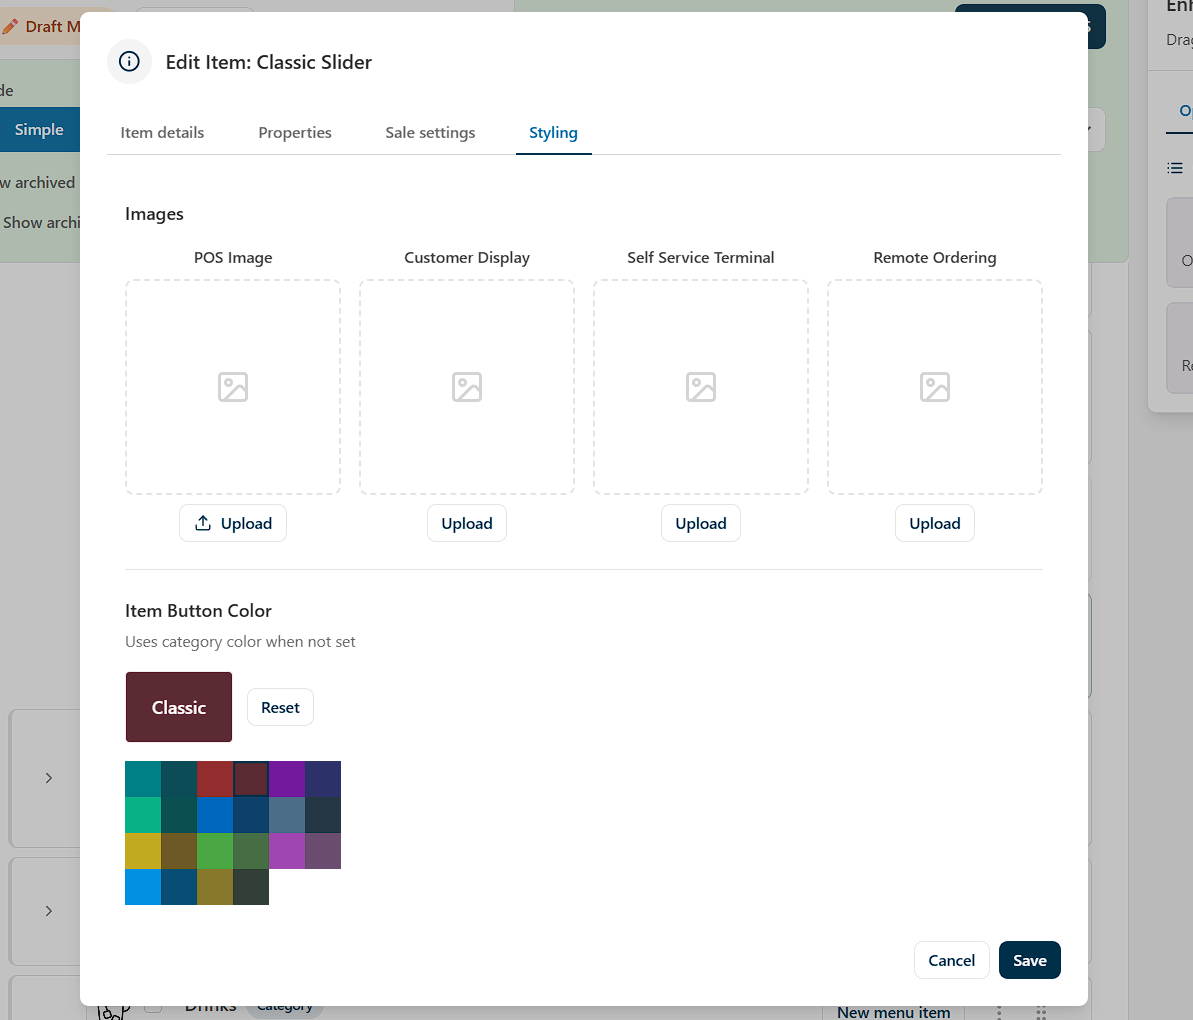
The Styling tab provides control over how the item appears visually within the POS environment.
- Different images can be assigned that appear in different areas of the system.
- A custom Item Colour can be applied to override the category colour. This is often used to make certain items stand out, which can improve cashier speed and support upselling during service.
Saving and Managing Items
Once configuration is complete, the item can be saved. It will then appear within its assigned category, where it can be accessed and managed as needed.
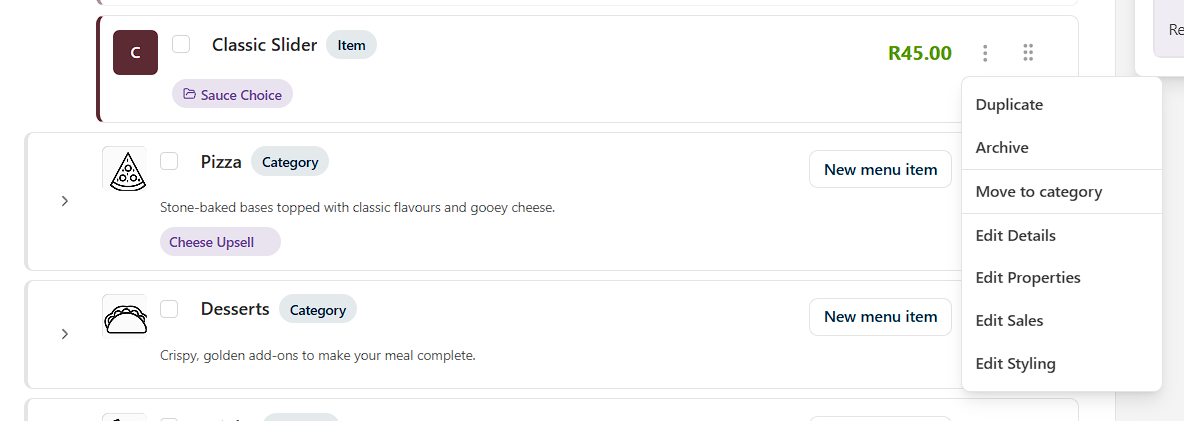
Items can be edited at any time by double-clicking their item card. Additional actions, such as duplicating or removing an item, are available through the item’s kebab menu. These tools are particularly useful when managing larger menus or creating similar items efficiently.