
CounterPOS layout and functions
The CounterPOS interface is designed for efficient order processing and sales management.
The CounterPOS interface can be divided into Five main sections:
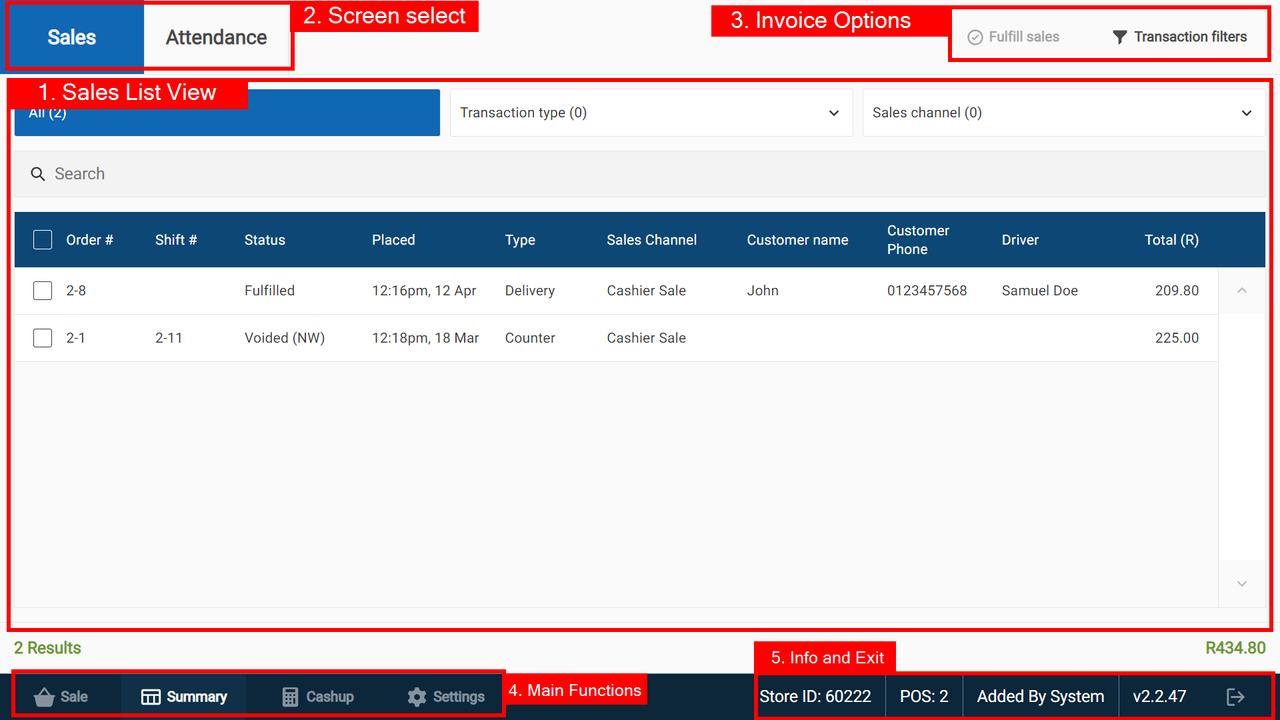
- Sales List View - This is a list of all invoices that are not assigned to a posted till shift.
- Screen select - Swap between the Sales and Attendance summary screens
- Invoice options - This allows you to set Transaction Filters, or Fulfil sales that have been paid and delivered.
- Main Functions
- The Sale tab is where you start a new order.
- The Summary tab is where you to see all orders placed for the day
- The Cashup tab takes you to the cashup screen.
- The Settings tab is where you change the settings of CounterPOS
- Information and Exit/Log Out
- Date & Time should always be the same as the date and time on the server.
- POS ID is the ID given to this device to identify it during Cashup or on the Portal.
- Shift can disappear if there are no active shifts.
- Cashier name who is logged in - can disappear if there are no cashiers logged in.
- CounterPOS version currently being used.
- The Log Out tab is where you log out of CounterPOS and end your shift.
Key features for Aura CounterPOS regarding transactions & sales channels:
- Customer integration - a customer record can be linked to any order type and the new Sales Channels.
- Transaction/Sales channel filter function - while viewing the summary tab, you may search the current list for specific invoices or order numbers; this is very helpful near the end of a busy day if a customer requests a duplicate copy of their receipt.
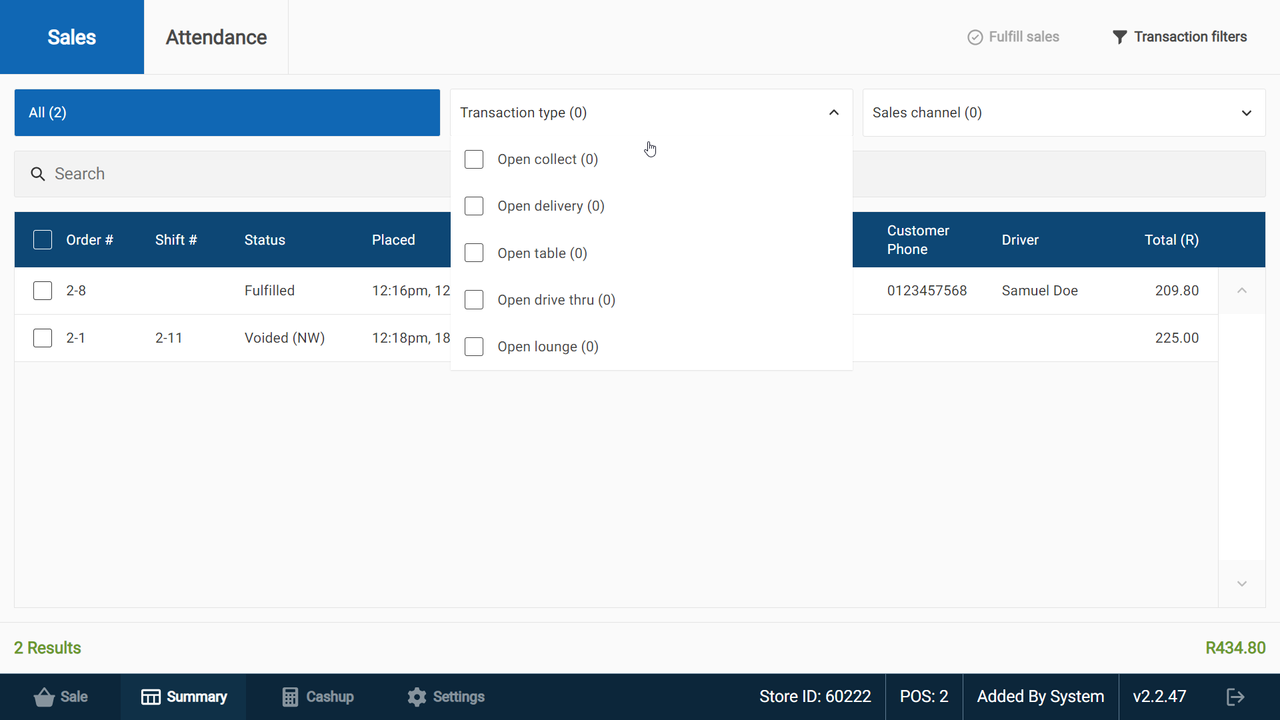
- Order filter function - while viewing the summary tab, if searching for an invoice fails, you now have the ability to filter all orders.
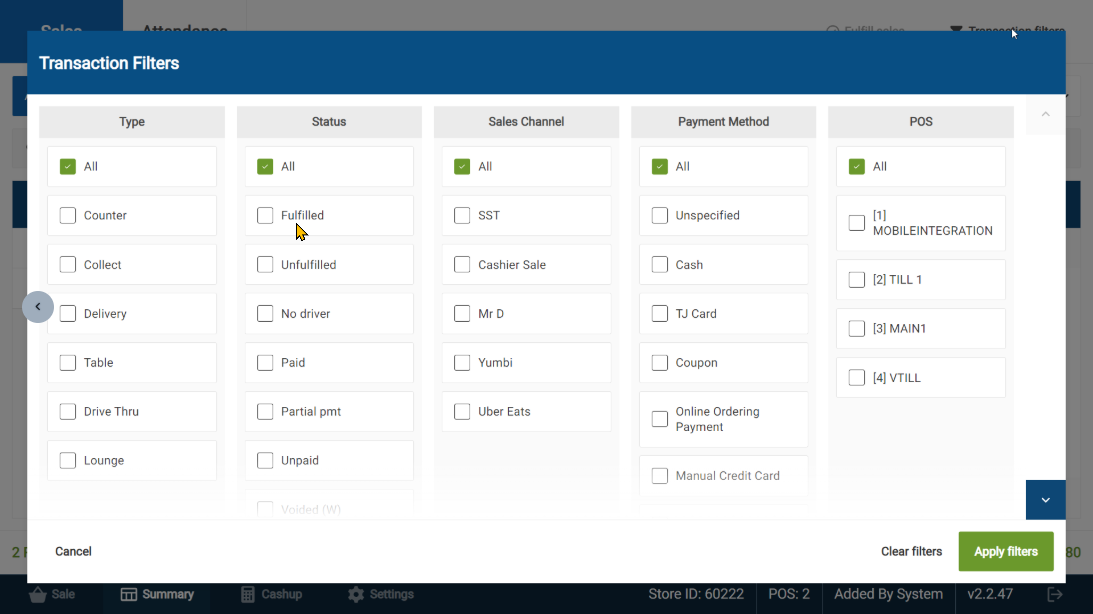
| Some filters will only be available once the "filter" type has been processed. |