
Processing a new sale in CounterPOS
Once a new shift has been started, you can process a new order by clicking on the Sale button at the bottom of the screen.
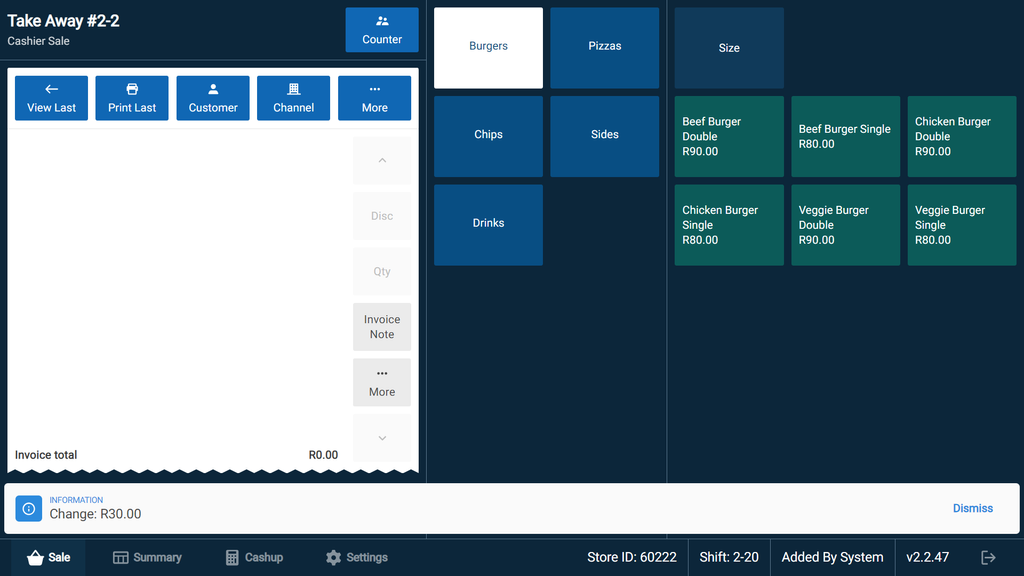
This will open the sales processing screen:
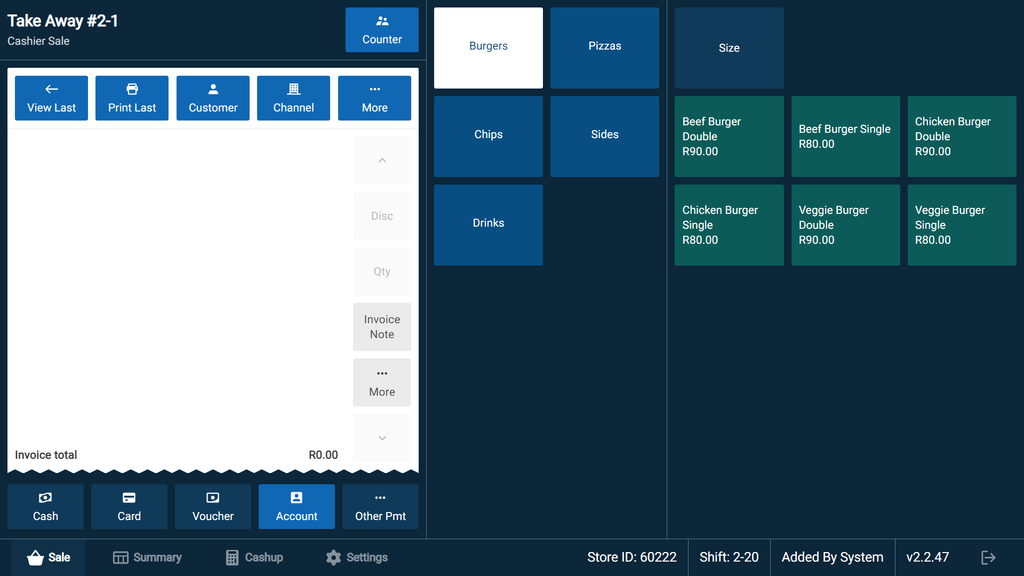
The Invoice screen can be divided into 6 parts:
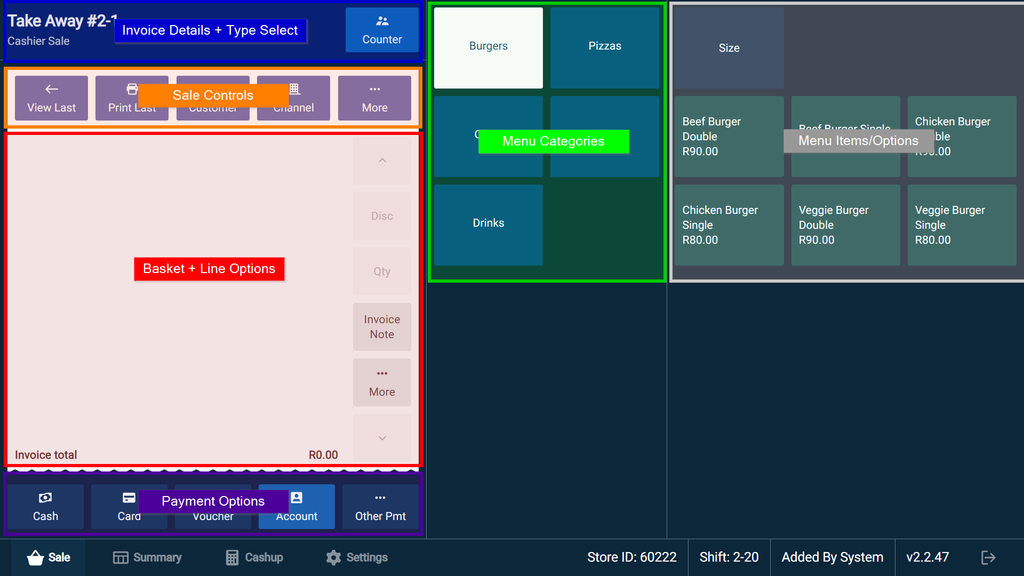
- Invoice details - the top-left banner displays information about this transaction, such as cashier, customer etc. You can set the Order Type here (Counter, Collect, Lounge etc.)
- Basket/Line options - The left panel shows you all the information with regards to the sale, including rung-up menu items, the invoice total, and gives you the controls to discount, change item quantity, add notes, or void line items.
- Sales controls - Above the left panel is a row of buttons that allow you to re-print the last invoice, add a customer, choose a sales channel, and choose additional options under “More” (this may include customised integration options).
- Menu categories - The center panel shows categories which allow the cashier to change the displayed menu items according to category that has been selected.
- Payment options - The lower-left panel allows you to choose a payment option from the list of available sources, including “Other” third-party payments systems, Cash, Card, Voucher, or on Account.
- Menu items/options - The right-hand panel is the menu item selector. Once a category has been selected, you are able to one of the category's menu items. You can also filter the available menu items according to their Size.
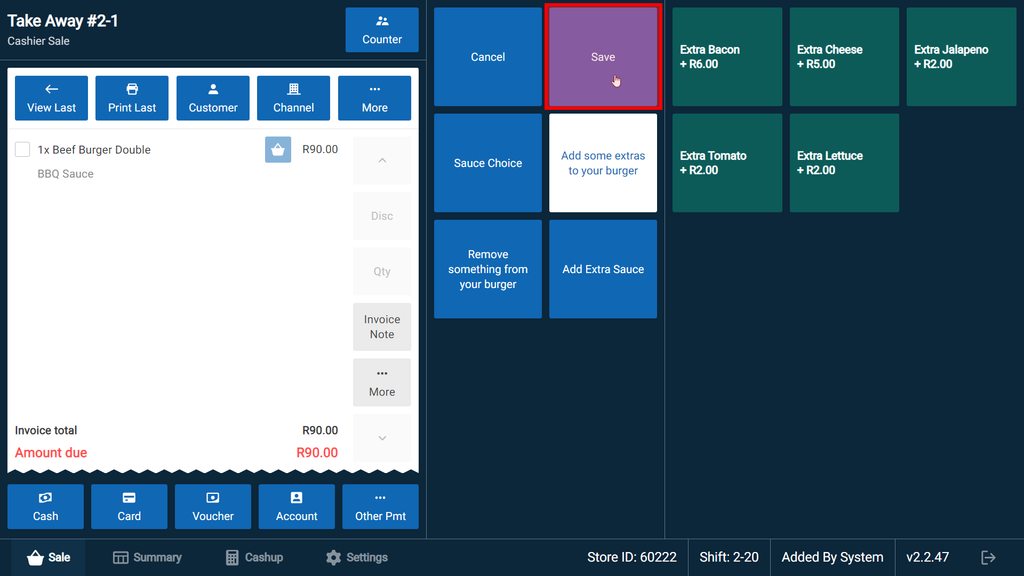
After you have added the items to the basket, tap Save.
When adding items to the basket, you will notice a small block with a number inside, these are quantity indicators, for example, having 2 buddy drinks will add a quantity indicator of 2 on the Drinks category and the buddy option.
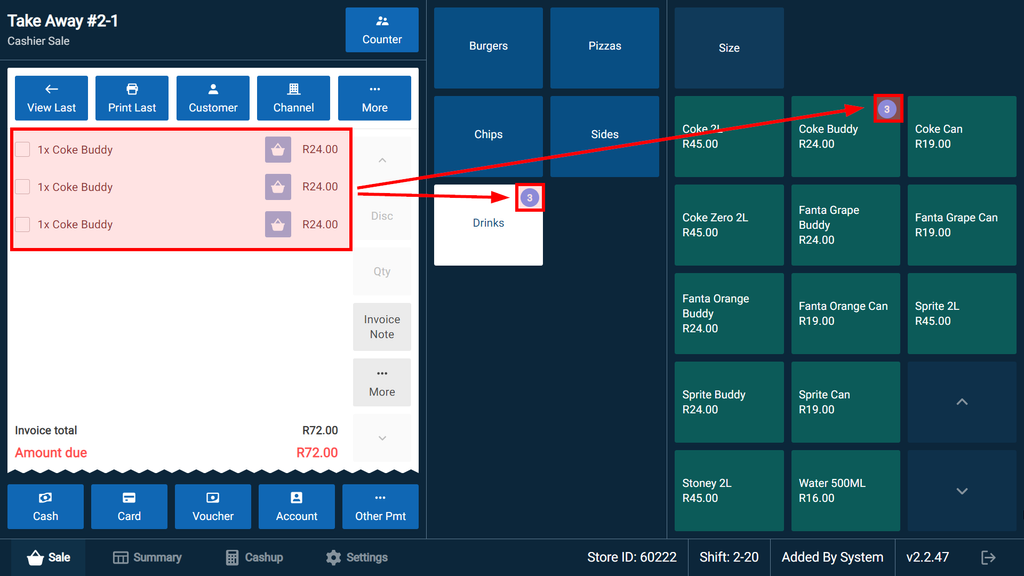
Having multiple items in your basket will be indicated by multiple quantity indicators.

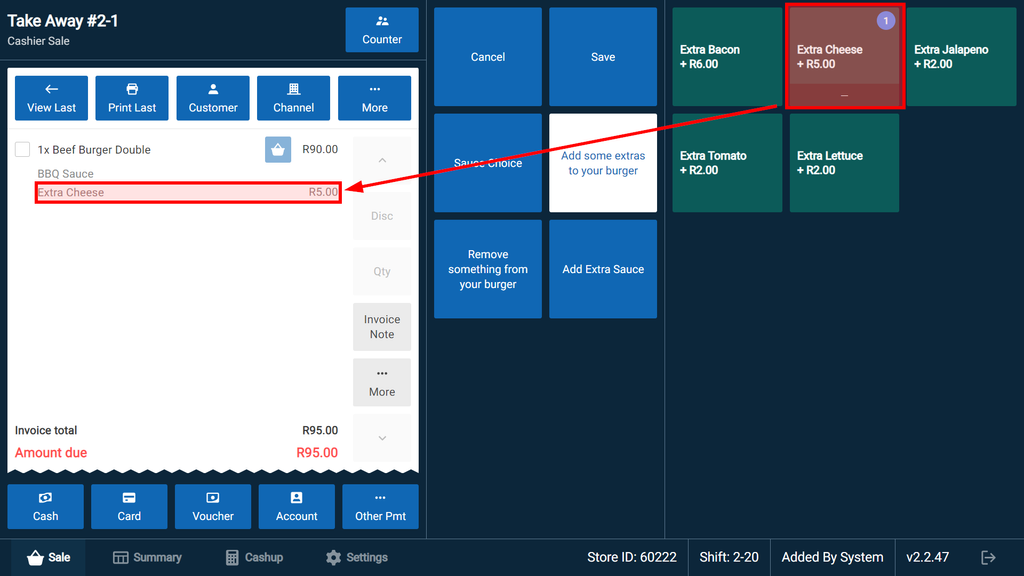
When selecting certain menu items, you will be presented with Option boxes in the category field that will temporarily replace the menu categories. This represents optional additions available for the selected menu item.
When selected, these items are added to the basket nested under the parent menu item:
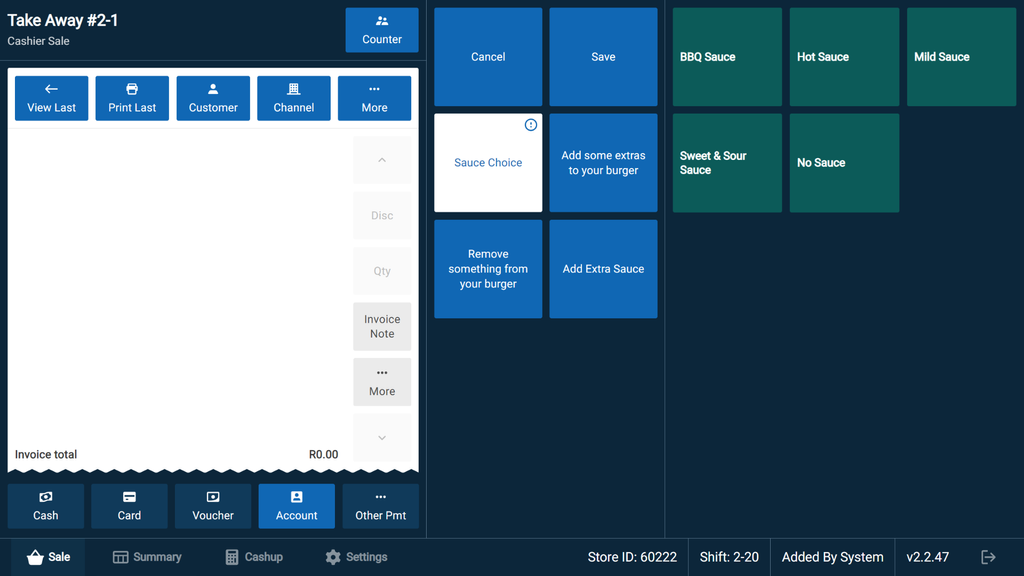
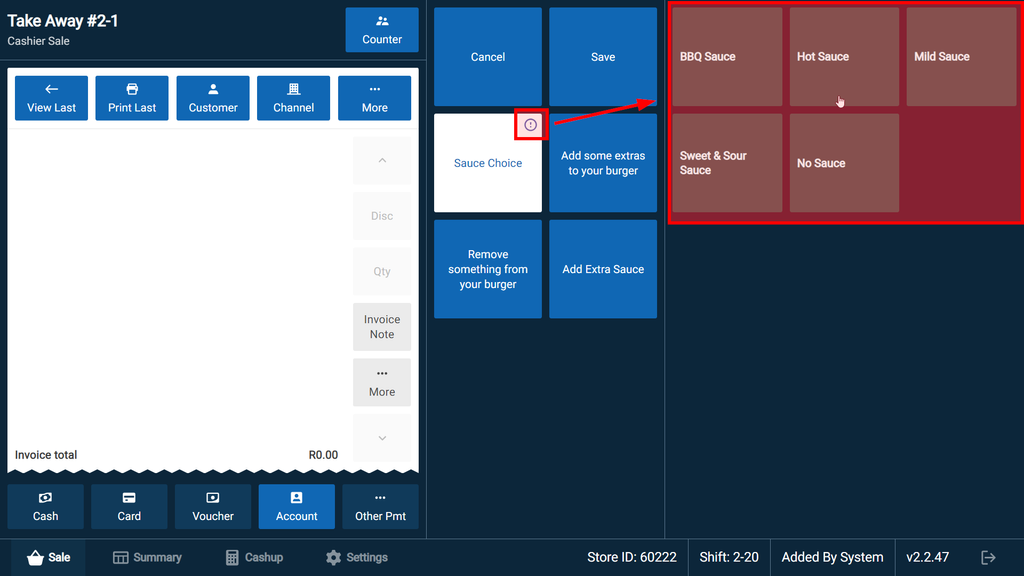
But on some occasions the options will be presented win an exclamation icon which indicates a required option. A choice must be selected before the sale can be saved.
Adding notes
Now, let's learn how to add a note, if necessary.
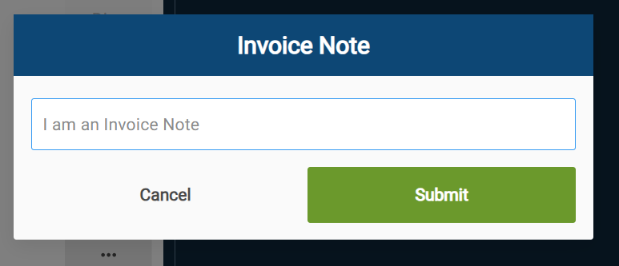
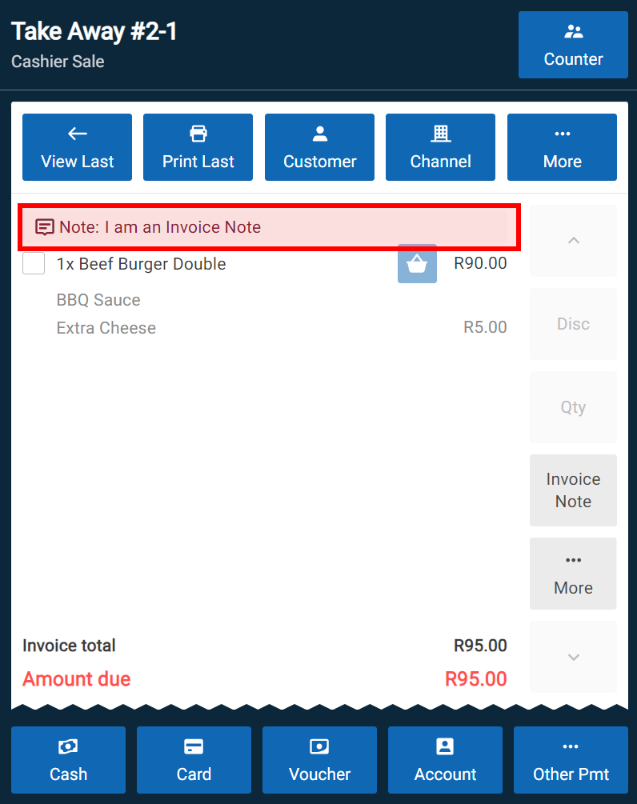
When no items are selected, an Invoice Note will be added.
Invoice Note - Specific request or instruction with regards to the entire invoice
example of invoice note: "When delivering ask for the customer at reception".
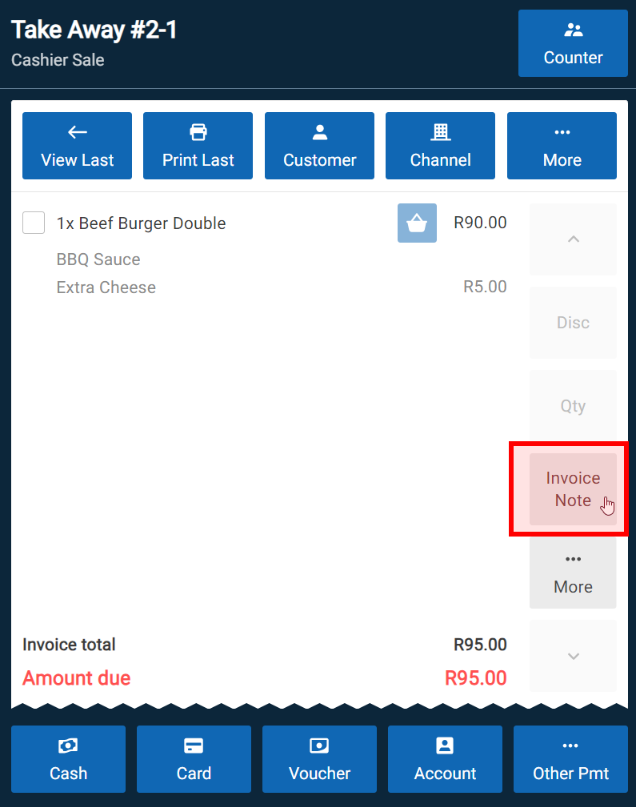
When an item has been selected, an Item Note will be added:
- An Item Note is a specific request or instruction with regards to the item, it is important to note that you cannot use item note that would affect the stock quantity or prices like adding or removing toppings. e.g "Buddy coke should be room temperature".
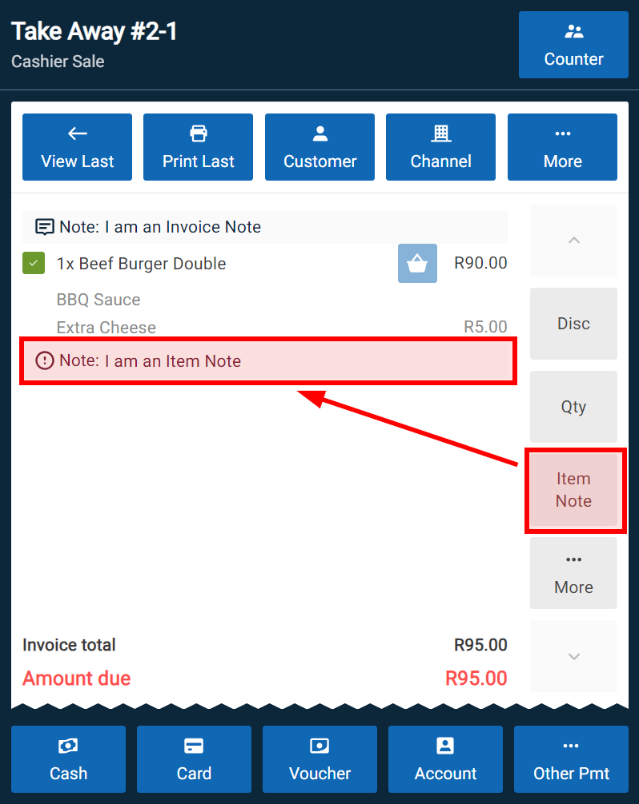
When submitting an Item Note it will appear as a new line underneath the item.
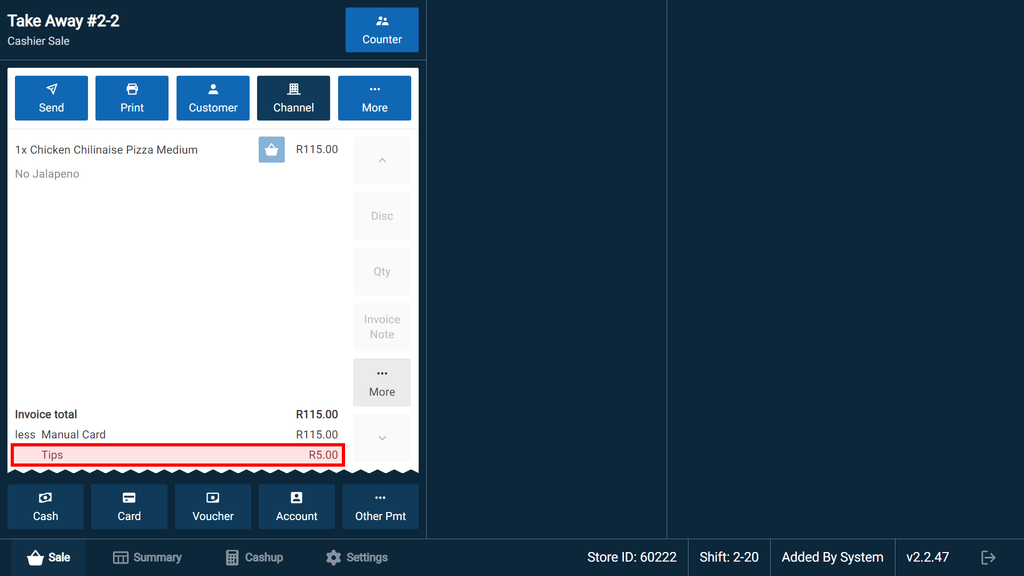
Processing payment
Now that we can add notes, let's pay for the order.
Payments are done in the Invoice Control section; you will have the following payment methods:
- Cash
- Card
- Voucher
- Account (Linked to Sales Channels)
- Other pmt

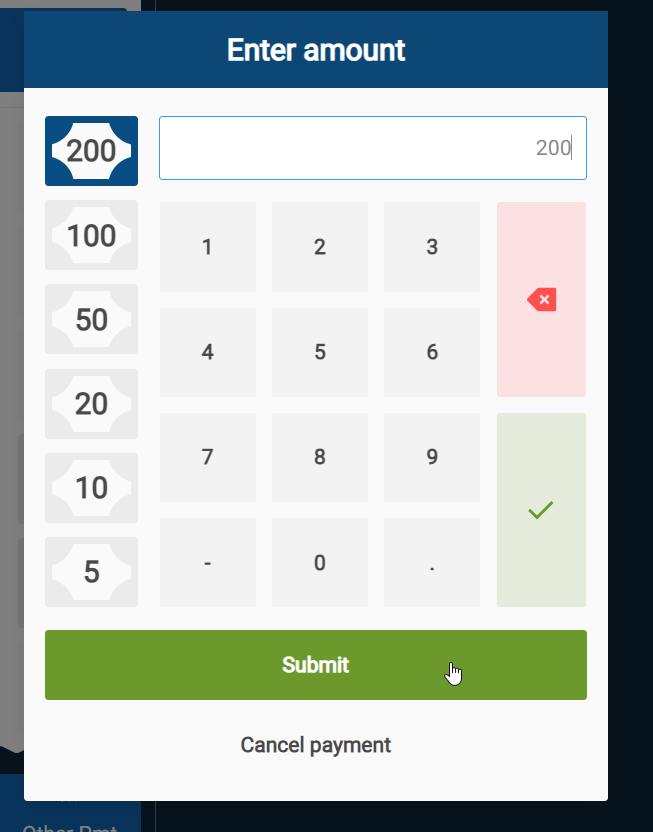
When paying the order using Cash, you will notice some large denominations on the left-hand side, this is based on the most commonly captured amounts, once the total has been added, you will need to click on the green tick which will automatically send the order to the kitchen.
When a payment has been received the change will be shown and the sale will automatically move to a new Sale screen
Adding a tip - When adding additional cash, the amount will appear as Change, however when adding an amount for a tip to any other payment, such as Cards, it will appear as a tip:
Fulfilling Sales
Some sales, such as delivery or collect sales, may have been paid in advance or online. In this case, the system will mark these sales as 'Paid', but they may not yet have been completed yet in that they have yet to be delivered or collected.
To fulfil a sale, select the “check box” next to the order on the Summary screen. You can also select multiple checkboxes to fulfil multiple orders at a time.
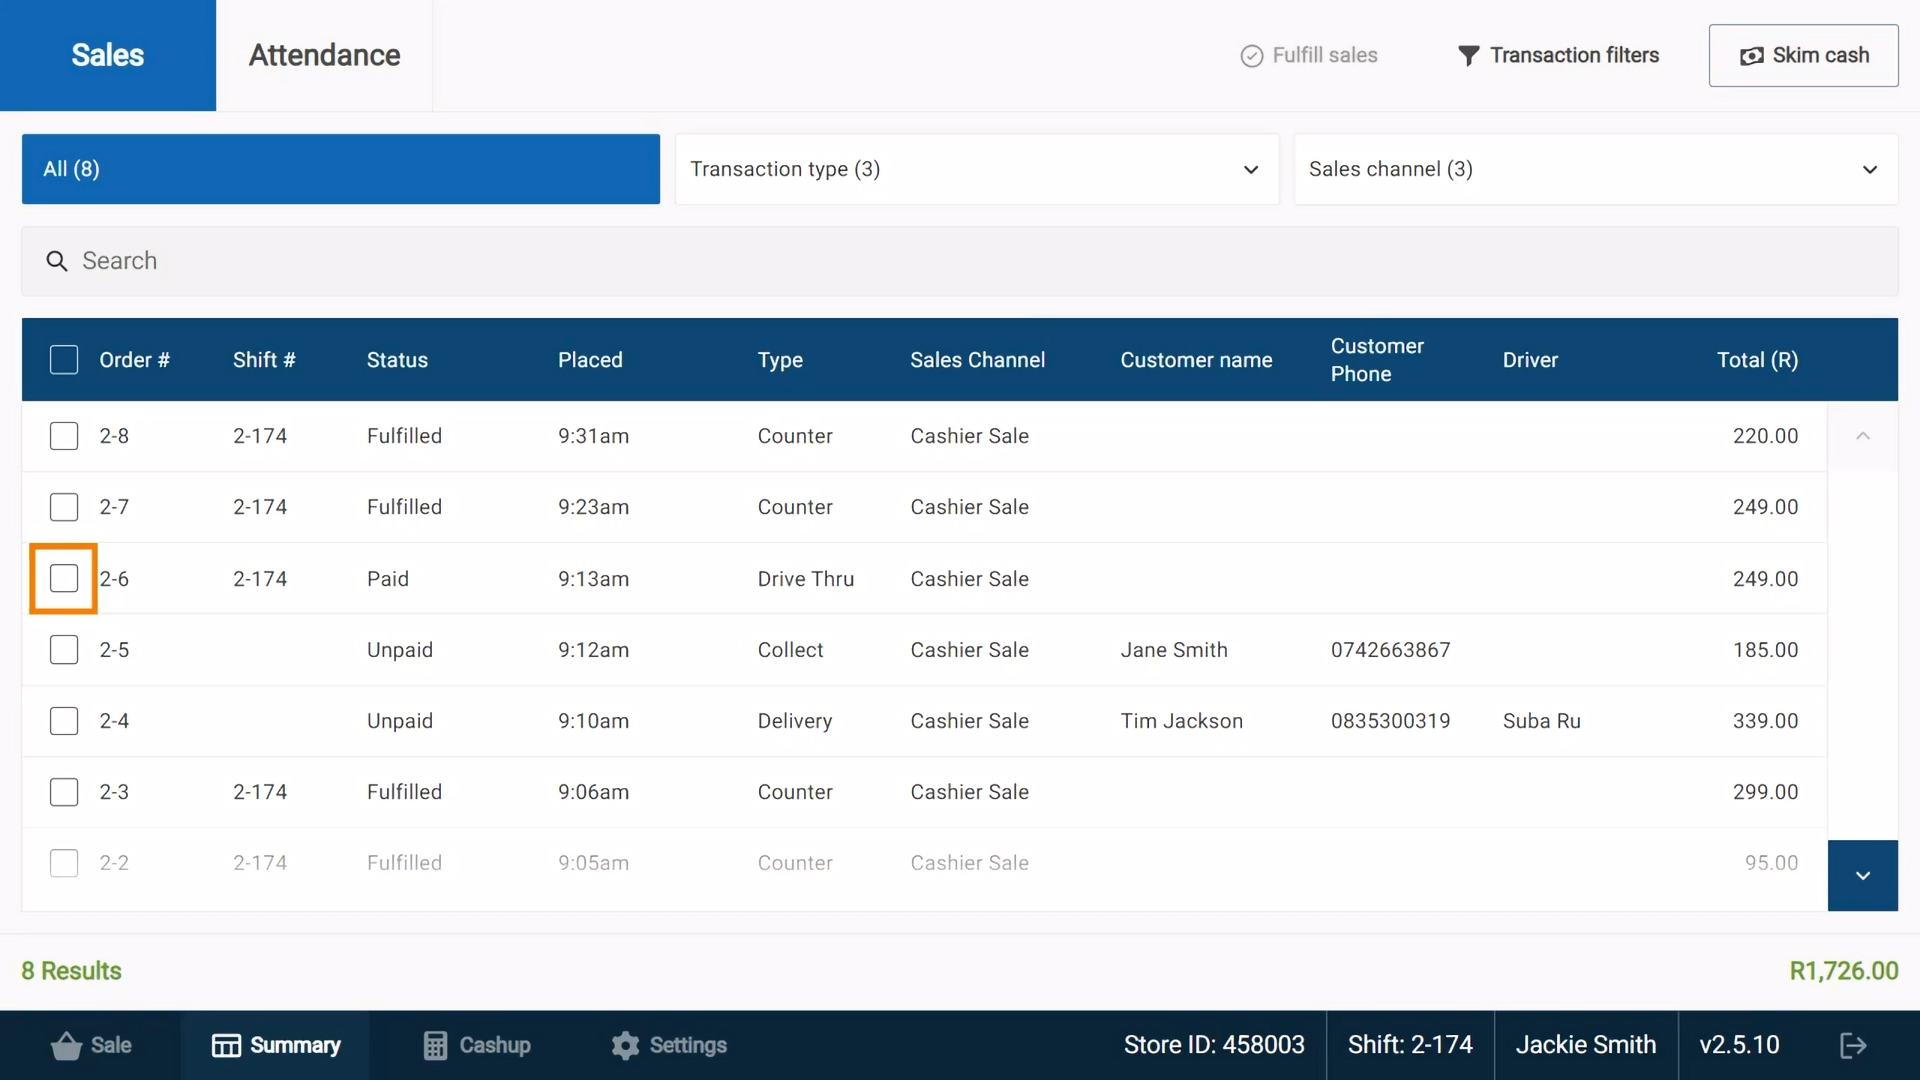
To the top right of the Summary screen, we have the “fulfil sales” button.

Marking a sale as 'Fulfilled' means payment was successfully received, the order has been handed to the customer and the order is ready to be included in this shift’s POS cashup.