
Capturing stock returns
Viewing Returns
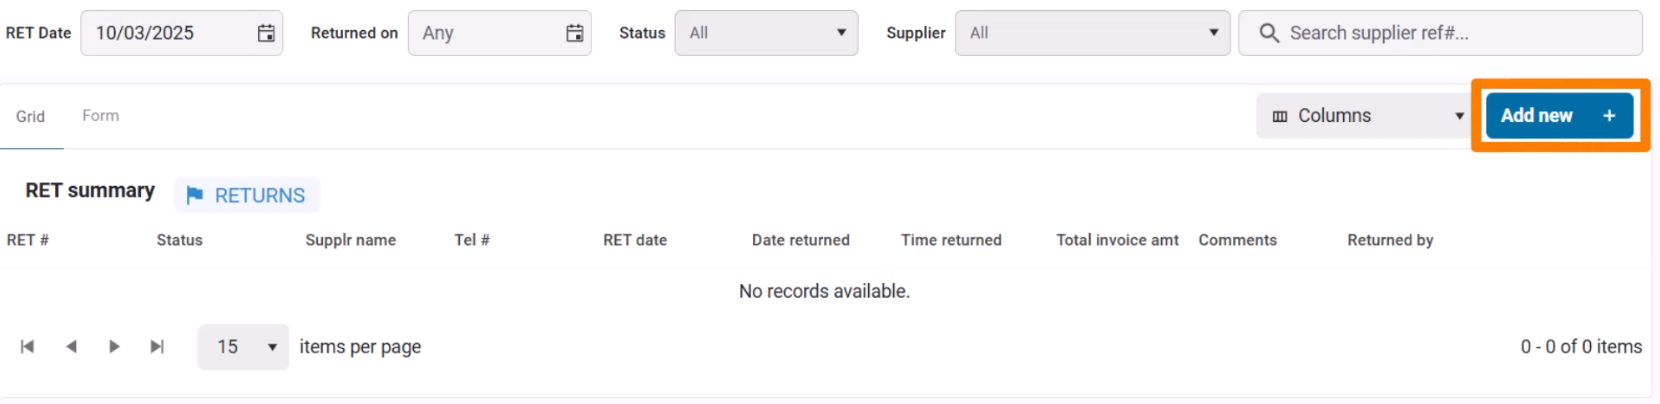
When you open the Returns page, it displays a list of all returns recorded for the selected Return Date. You can adjust the date to view past records and further filter results by:
- Date Received
- Status (Draft, Received, or All)
- Supplier

Recording a Return
To log a new return, you can either click Add New from the Returns page:
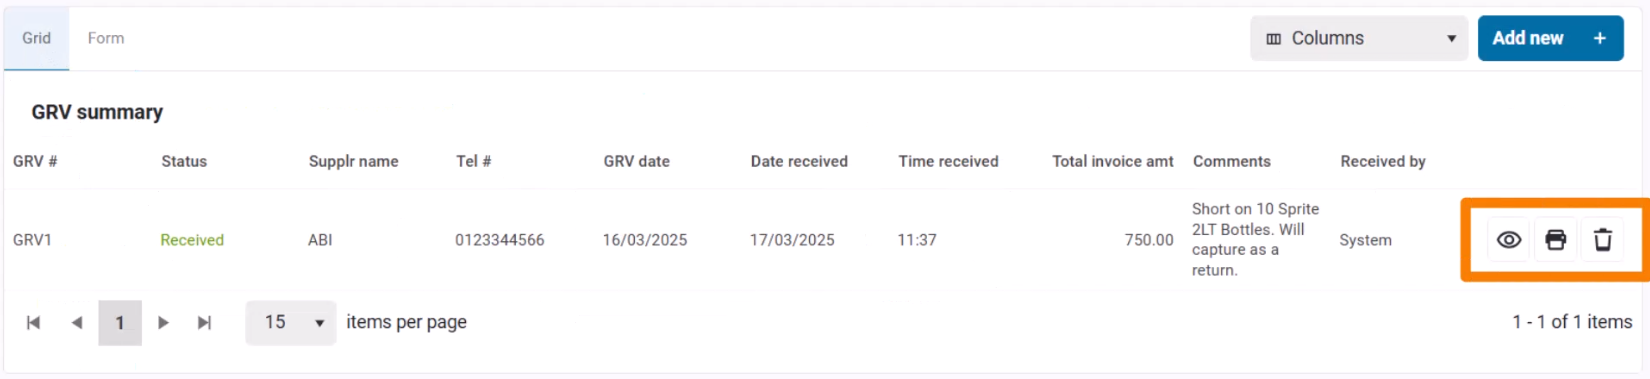
Alternatively, you can log a return directly from any GRV after it's posted, which is recommmended as it pre-fills the form with the correct GRV and supplier details.
- Navigate to the GRVs page.
- Select the relevant GRV.
- Click Return to open the Returns form.
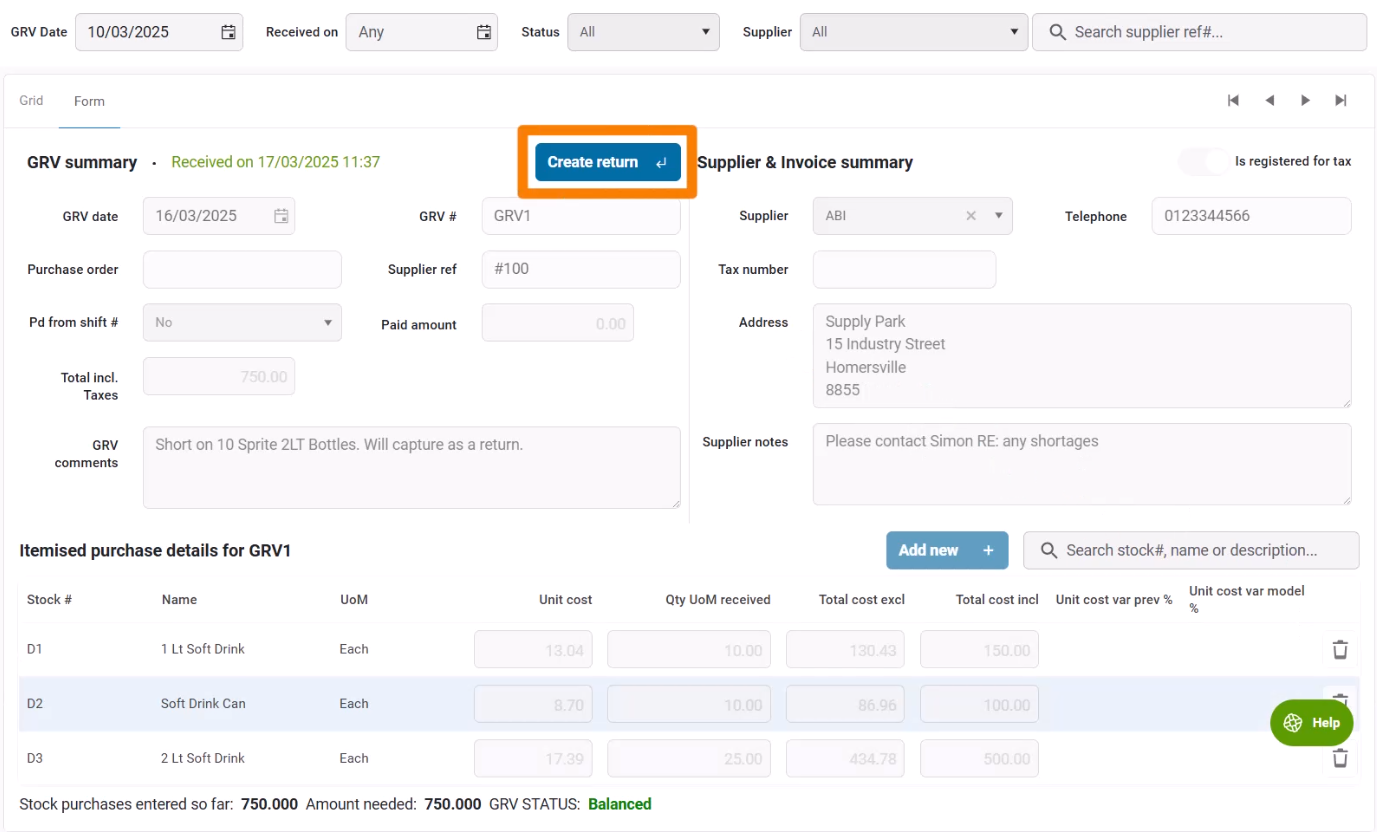
The Returns screen is similar to the GRV screen and consists of three main sections:
1. Return Summary Panel (Left Panel)
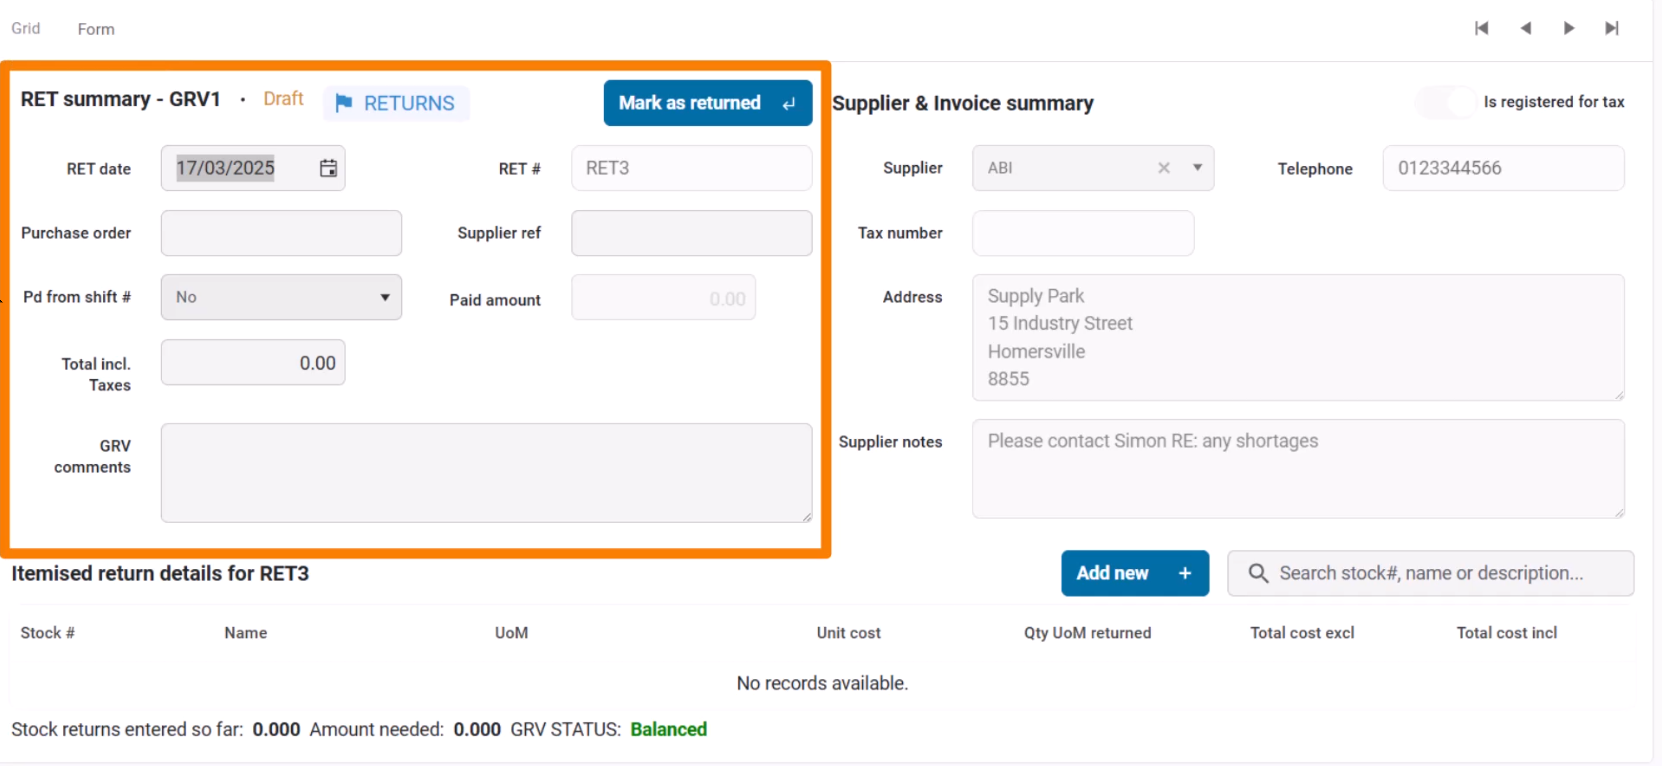
Capture key return details, including:
- Return Date
- Purchase Order Number (if applicable)
- Supplier Reference Number (original invoice number for reference)
- Refunded Amount (if applicable) – If the return resulted in a refund added to a POS shift, enter the amount (this option is disabled if the invoice was not paid from a shift).
- Total Amount Returned (including tax)
- Comments (optional)
2. Supplier Selection Panel (Right Panel)
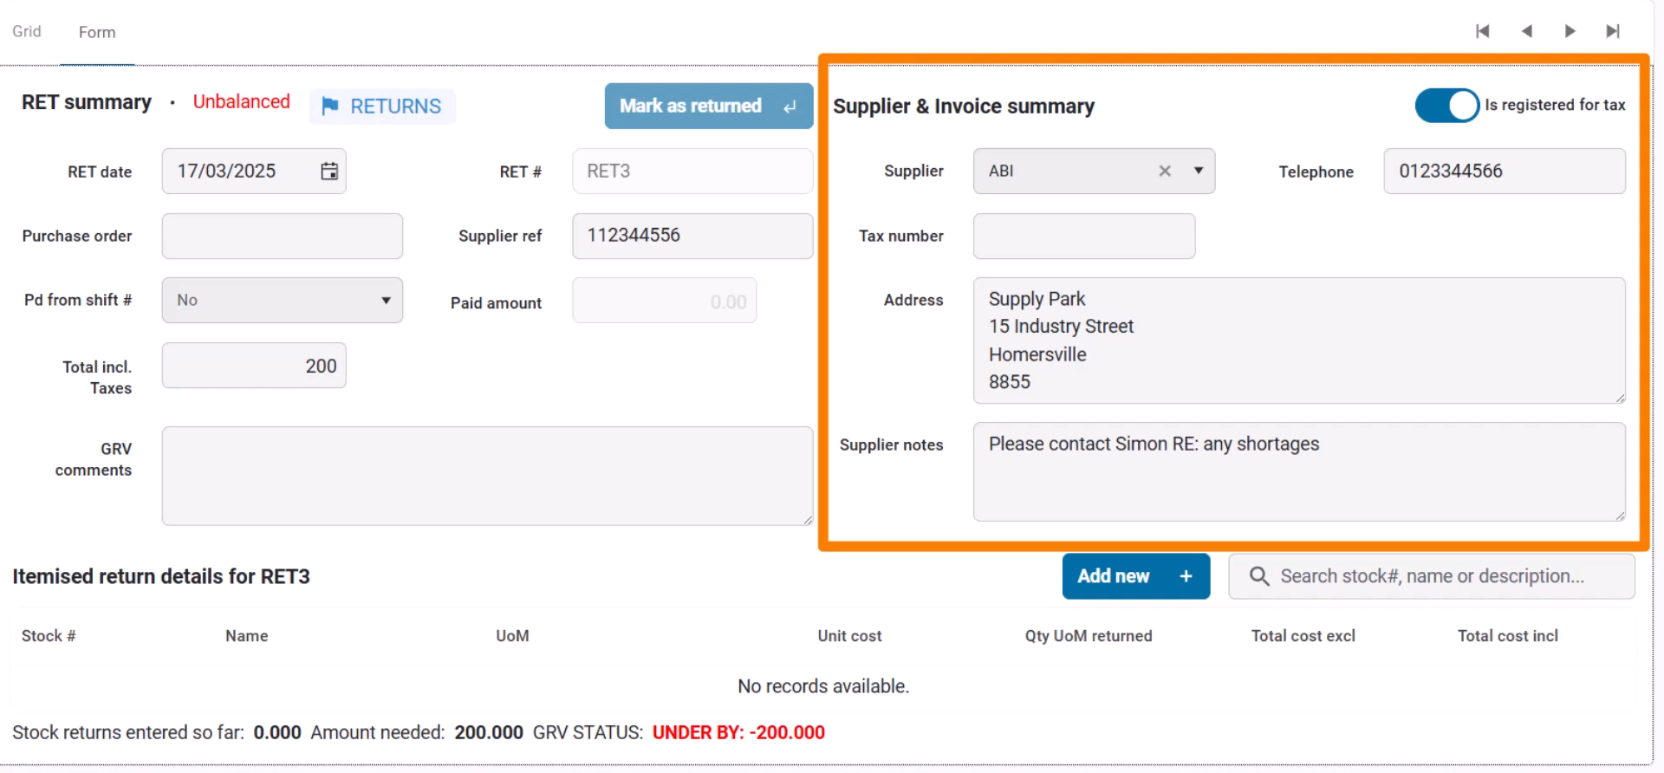
The Supplier field is automatically filled when returning from a GRV.
3. Itemized Return Details Panel
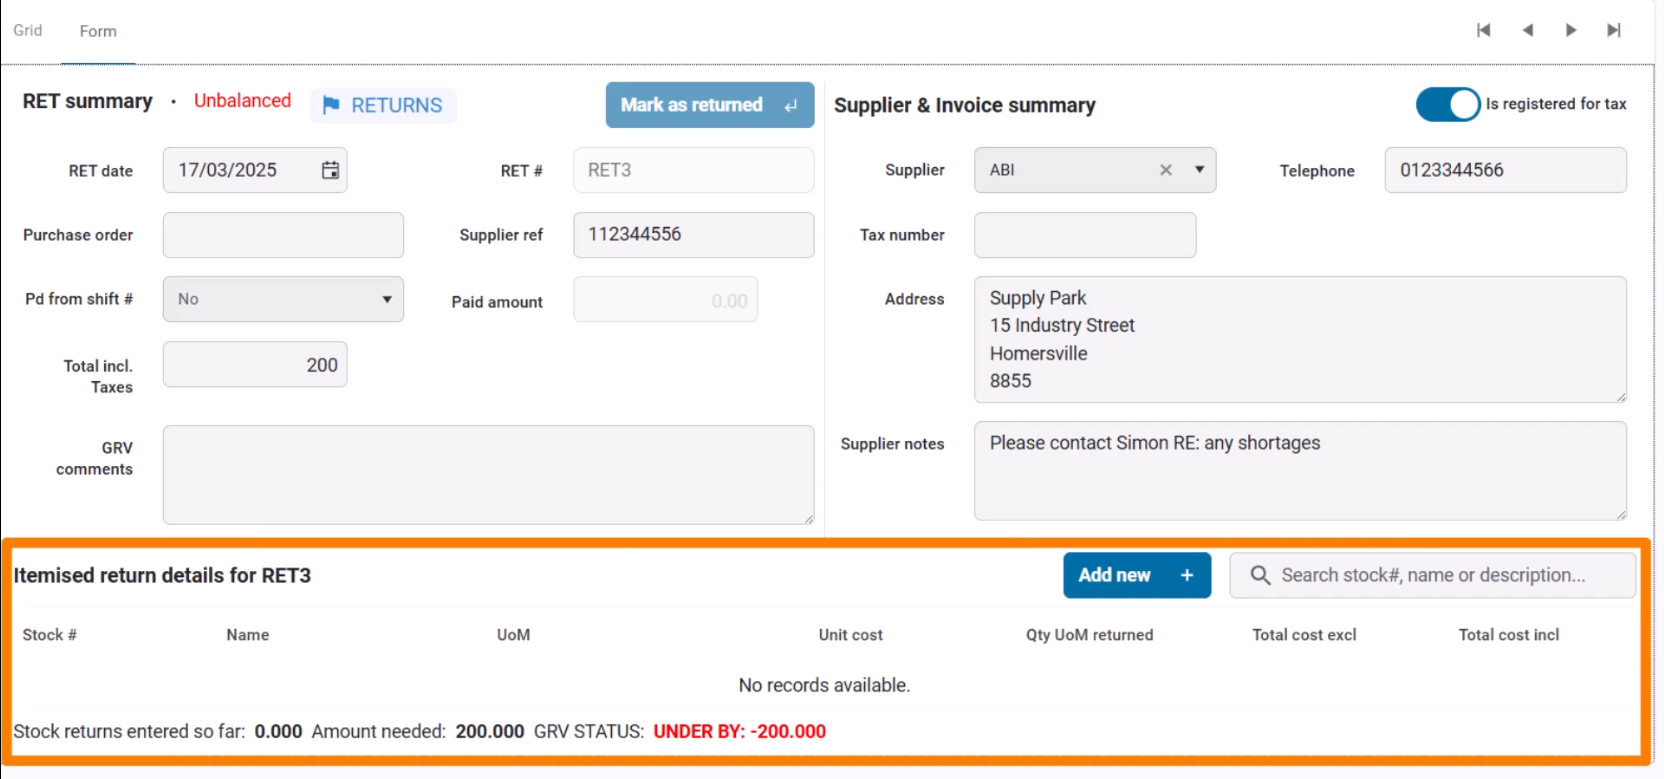
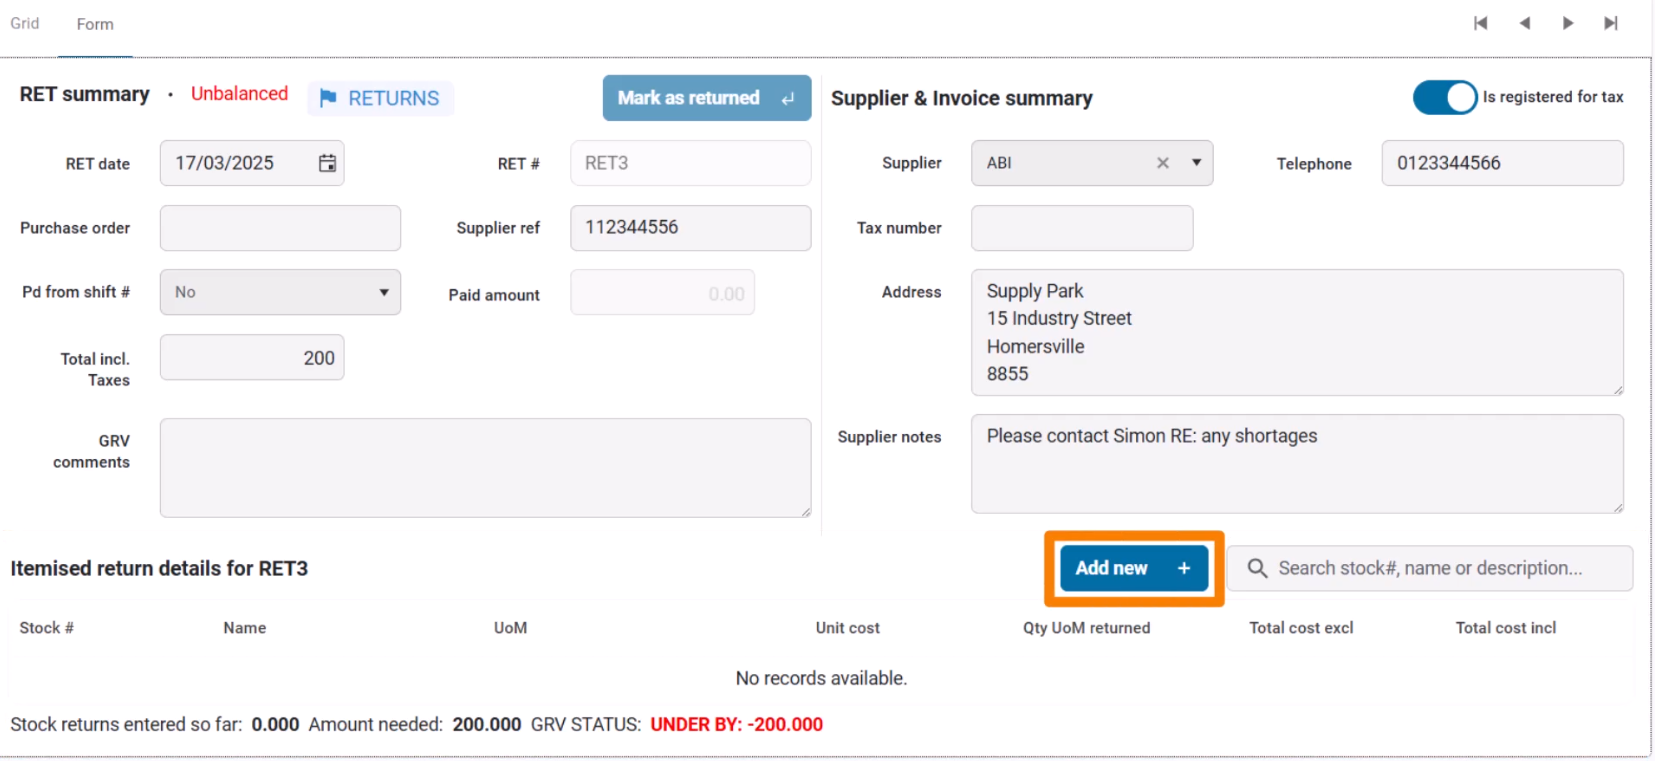
To add stock items:
- Click Add New.
- Search for the item in the stock list and click on the item to add it.
- Enter the Quantity and Total Cost (either including or excluding tax).


The system will compare the total value of returned stock to the recorded return amount.
Return Status Indicators
At the bottom of the screen, you will see:
- Stock Purchases Entered – Total value of added stock items.
- Amount Needed – Remaining balance required to match the return.
- Return Status – Indicates if the return is Balanced, Under, or Over.
Finalizing the Return
- Once all details are entered and the return is balanced, click Mark as Returned to finalize the return.