
Adding new users
Adding a New User
To add a new user, click the Add User button.
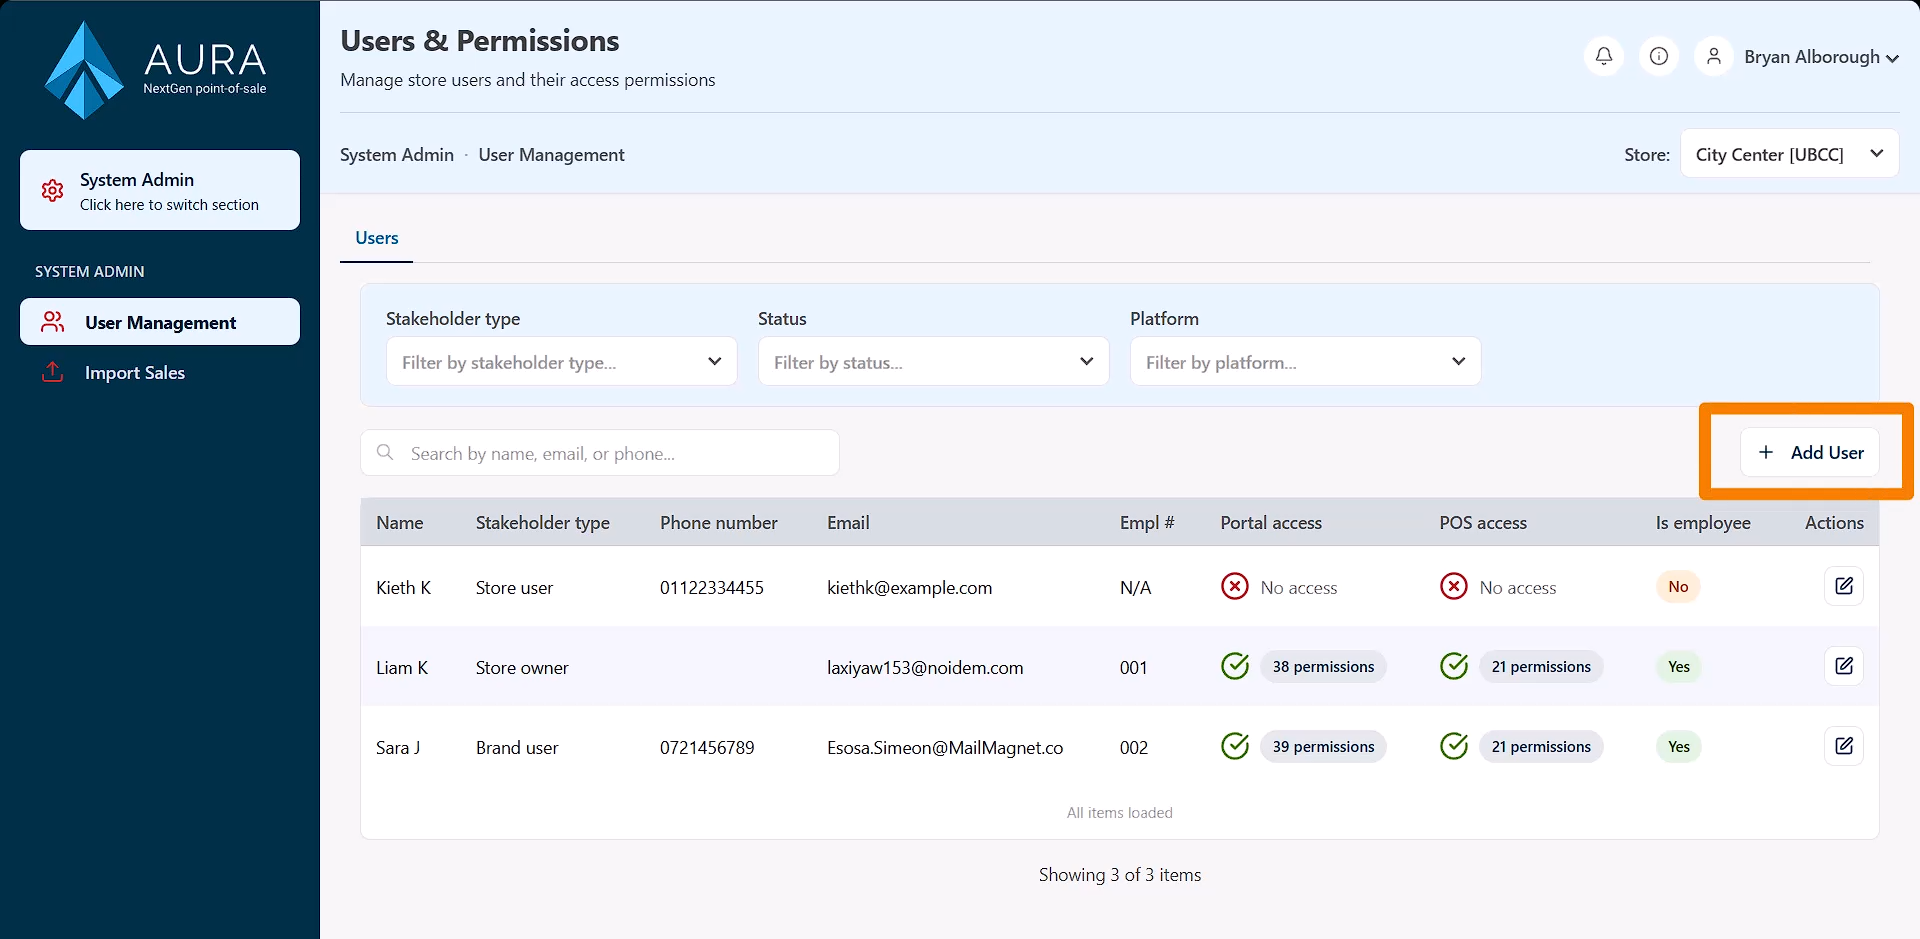
This opens a search window where you must first confirm that the user does not already exist elsewhere in the system. This check is important in situations where a user may already be active at another store or under another brand.
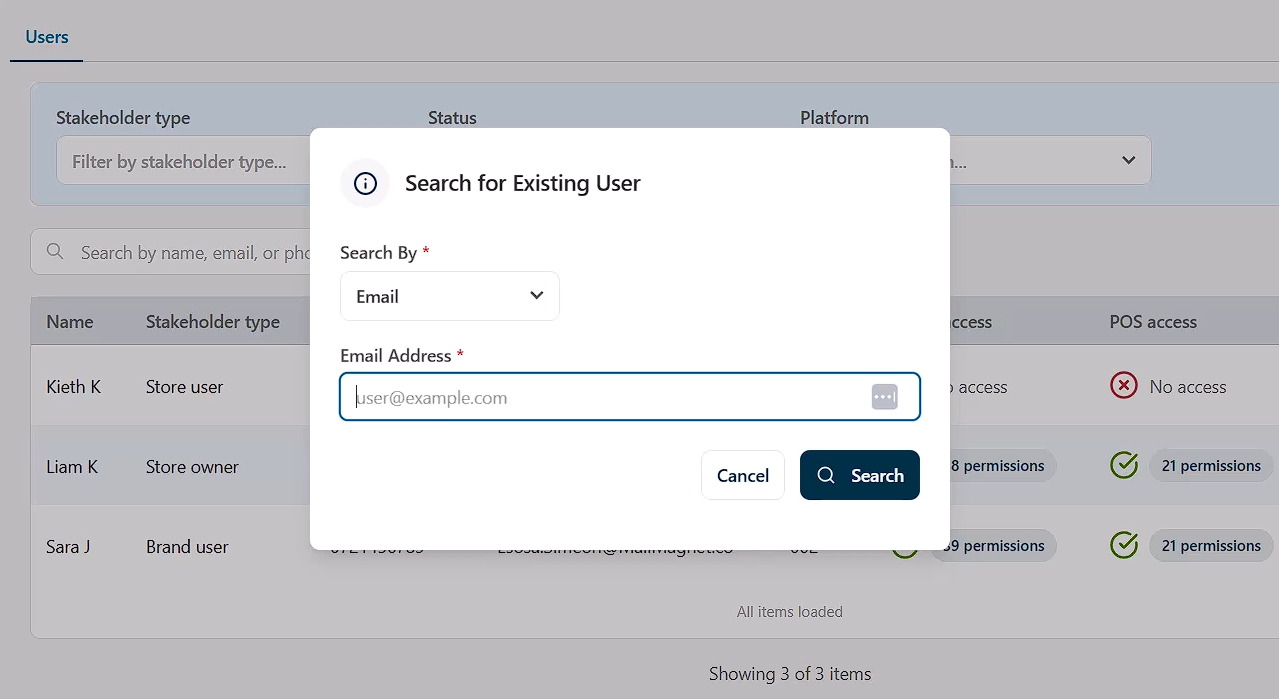
- If the user already exists, they must be reassigned to the current store using the User Roles page within the Brand context.
- If a matching user is found, you may select that user to edit them, provided you have the required permissions.
- If no existing user is found, you will be prompted to create a new user.
Capturing Basic User Details
Once creating a new user, enter the employee’s basic information.
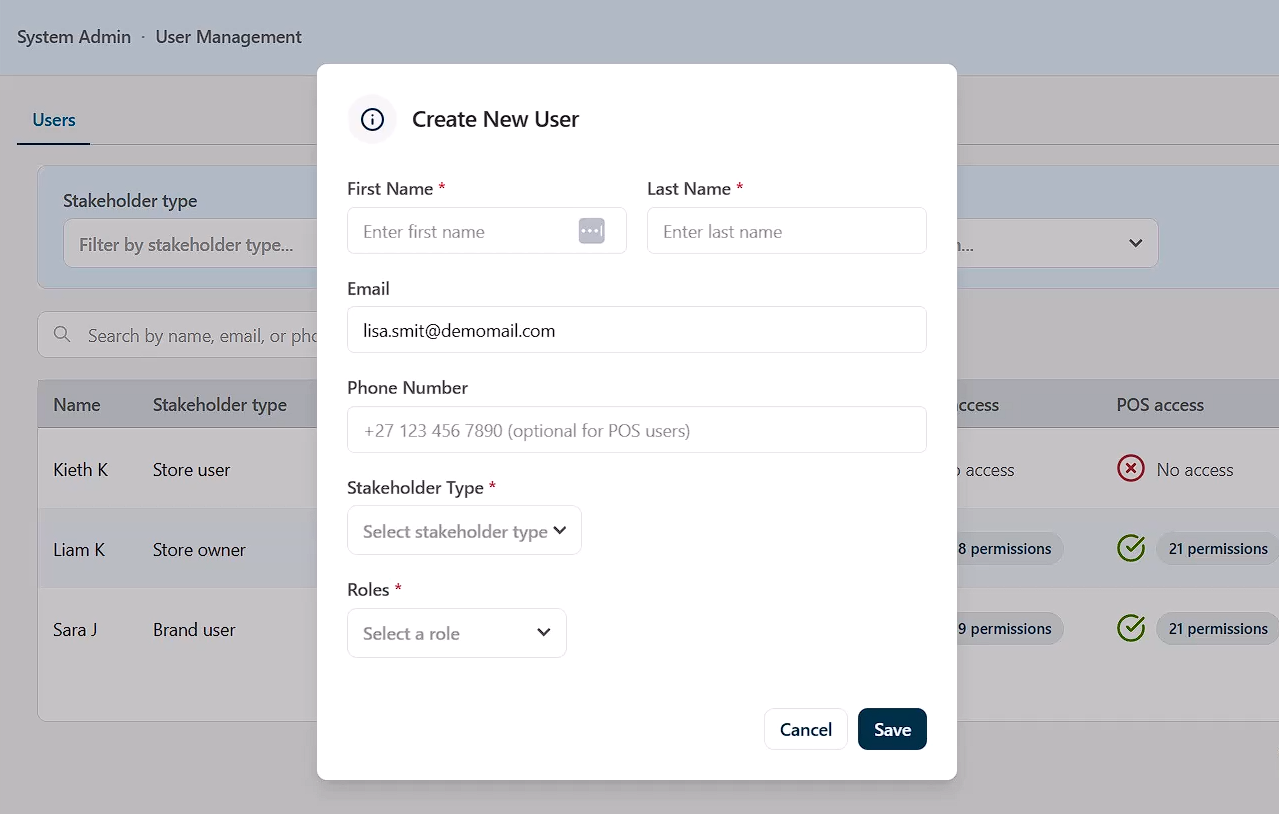
- The First Name and Last Name are required for all users.
- Both an email address and phone number are required if the user needs an account for the Portal. However, they are not required if the user will only interact with CounterPOS or other POS devices.
- Set the Stakeholder type for this user, which determines what roles will be available to this user
Assigning Roles
Next, select the roles that apply to the user.
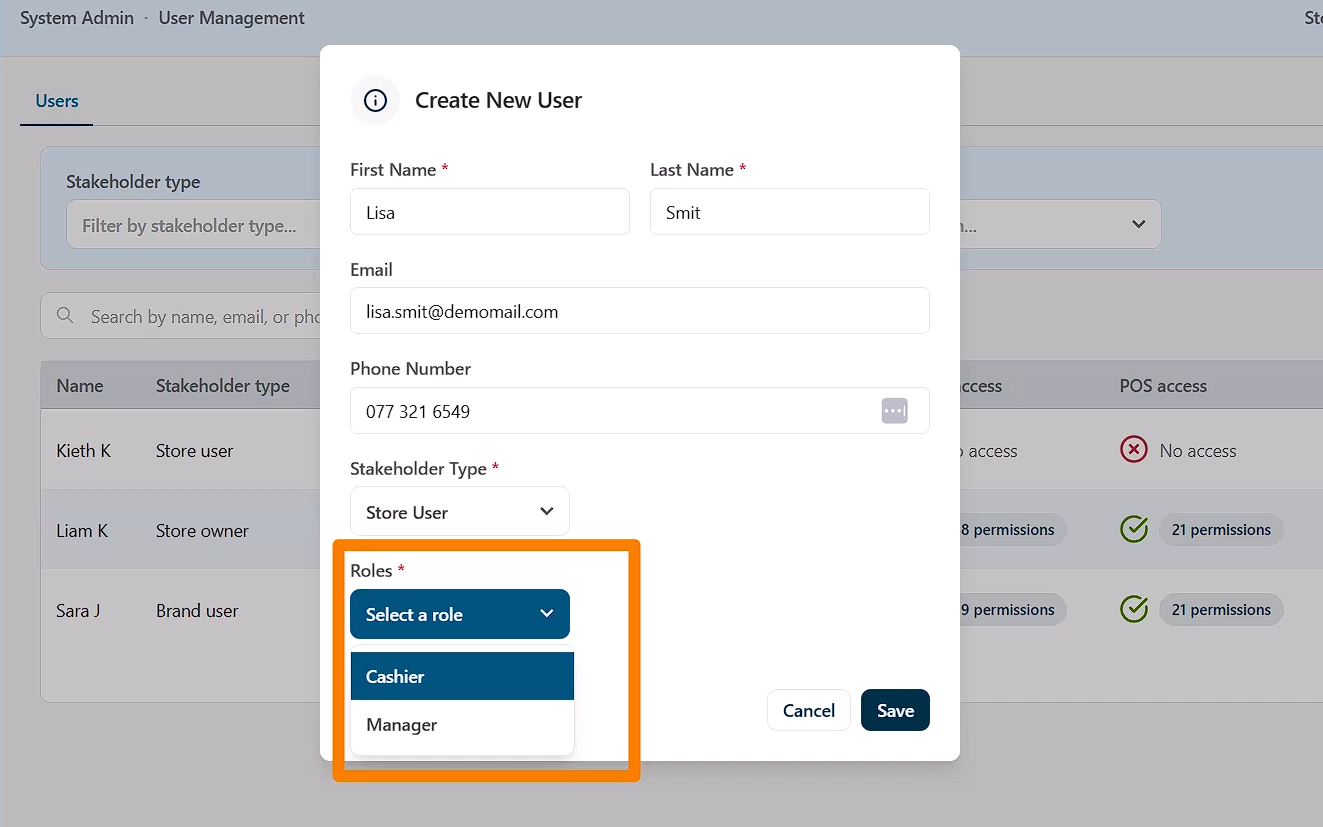
Roles determine the level of access a user has within the POS and Portal environments. By default, store users typically have access to roles such as Cashier and Manager.
Select the appropriate role for the employee. For example, if the employee is a manager, select the Manager role.
Once the role is selected, click Save.
Editing the User Profile
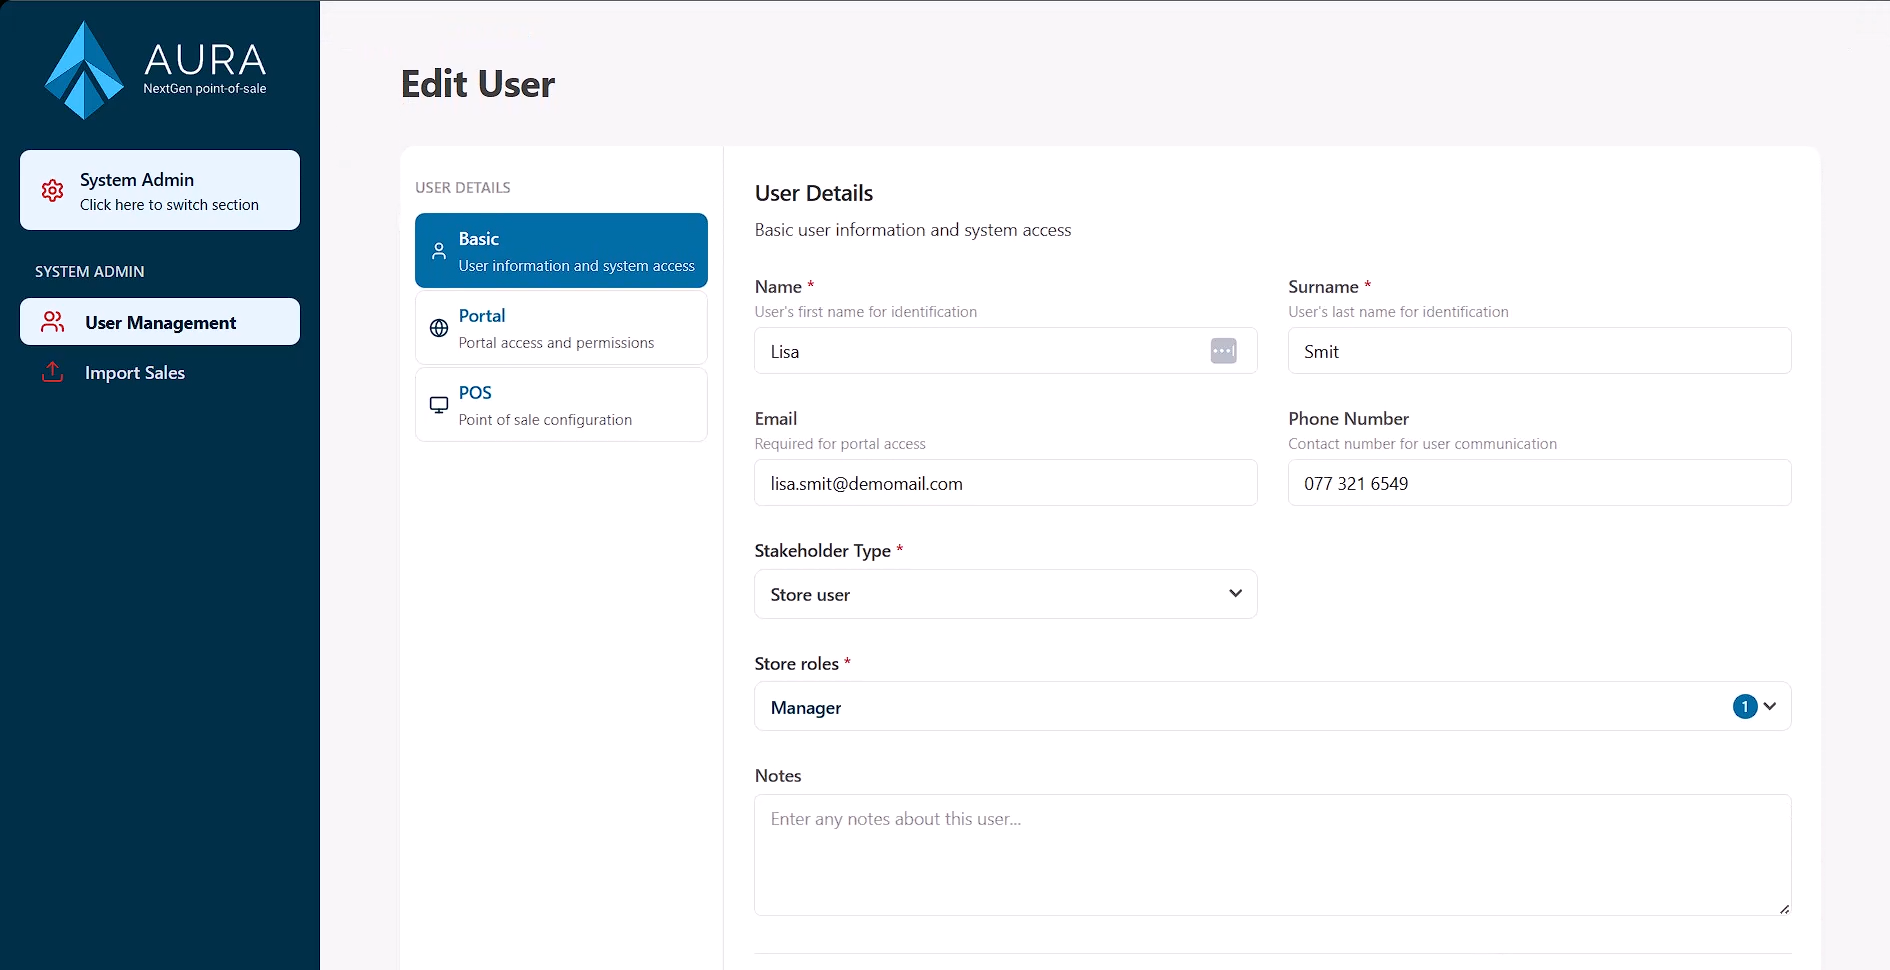
After creating the user, the Edit User form will open. Here you can review the details that were captured and add any notes related to the user if necessary.
System Access Options
The System Access section allows you to control where the user can log in.
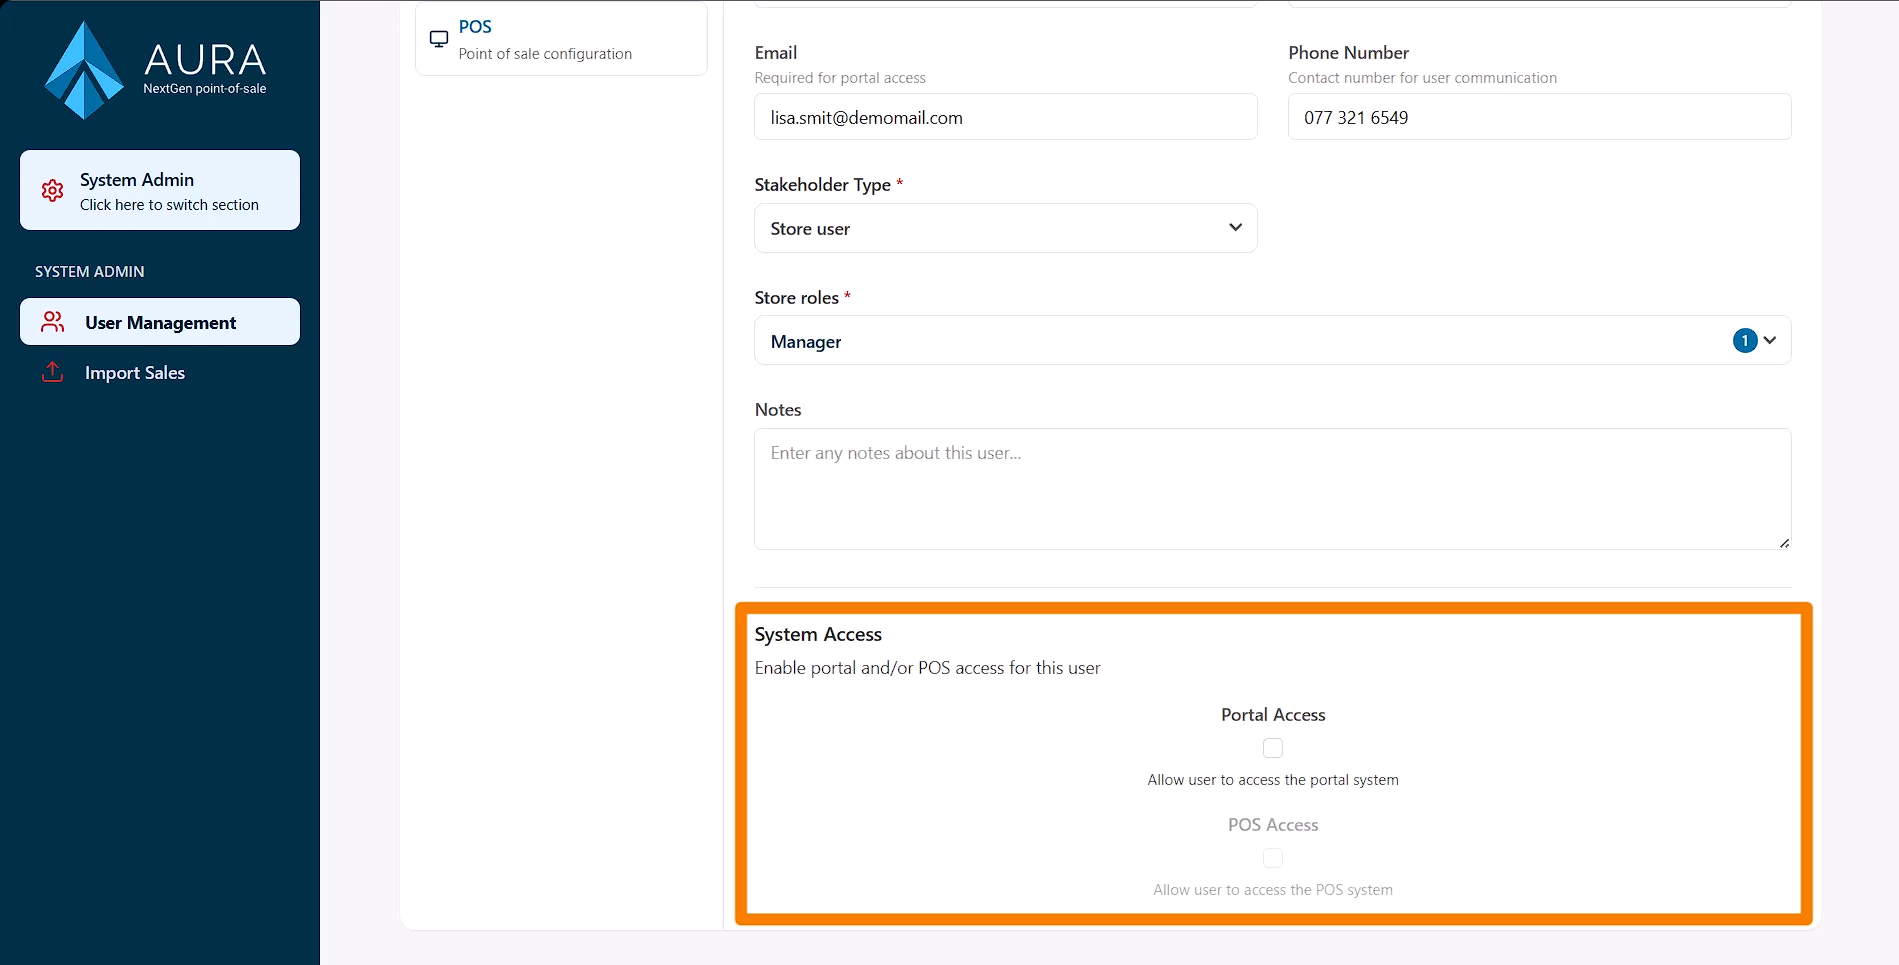
You can grant access to the Portal, POS or both.
- If Portal User is enabled, an email address is required.
- If POS User is enabled, the POS Properties tab will become available, and additional POS configuration will need to be completed.